



Sindy (version 2.0.1)

Revision dated 12 April 2017
1.General Information
1.1.Introduction
Sindy makes it easy and convenient to create various tests and conduct automated testing with them. Testing can be performed either directly in the program or using the functionality for launching user tests on the website http://www.ledisgroup.com
Tests can be created in such areas as:
- Education, where an examination test can be prepared in advance and then used to conduct an exam or assessment.
- Psychological diagnostics, including tests for such areas as career guidance, diagnostics of cognitive abilities and the emotional-volitional sphere, personality psychodiagnostics, diagnostics of the motivational sphere, diagnostics of social and communication skills or interpersonal relations and communication, diagnostics of intra- and intergroup relations, etc.
There are a great many ready-made tests for psychological diagnostics that only need to be created in our system and then used to achieve your goals.
- Professional selection and HR management, which can be extremely useful for automating candidate selection processes in recruitment agencies and human resources departments. Sindy can also be used to organize surveys not only of applicants but also of company representatives looking for promising specialists, in order to collect their requirements and process the results automatically.
- Employee assessment in organizations, with full automation of testing procedures and result processing.
- Consulting and surveys of an organization’s employees, when a project in any field requires you to perform a comprehensive analysis of the organization and assess its current conditions in order to prepare the most effective proposal for a potential customer.
- And any other areas where automation of testing and certification processes is required.
1.2.Distinguishing Features of Sindy
Sindy has the following distinguishing features:
Local single-user system. Sindy can be freely downloaded by any user and installed on a personal computer (provided, of course, that the user has the necessary permissions on that computer). You do not need to additionally install or configure any auxiliary software to work with Sindy (for example, database management systems, application servers, web servers, etc.). Immediately after the first installation, absolutely all functions of version 2.x are available free of charge and without restrictions.
Test construction. Sindy makes it possible to construct most known types of tests according to the algorithm described later in the description of the test structure. While creating a test, you can see all of its elements simultaneously in a hierarchical view, which makes the work very clear and significantly improves construction accuracy.
It is also possible to purchase a test developed by third-party authors and then import that test into the system with a simple operation and immediately start using it.
Running tests. The Sindy Test Player makes it possible to debug tests while they are being constructed or to launch completed tests for actual testing.
A distinctive feature of the program is the ability to expand the window of a running test to the full screen and eliminate the influence of unrelated computer interface elements on the test taker.
1.3.Product Contents
The Sindy program (product) distribution is provided as the distribution file “sindy_rus_x_x_x”, where x_x_x is the version number. When the file is launched, the installation procedure starts. As a result, the program working folder is created on the personal computer and the files listed in the following table are placed in it:
Table 1. Sindy program working files
| No. | File | Description |
| 1 | language.txt | File containing string resources for language localization. |
| 2 | license_Russian.txt | License in Russian. |
| 3 | readme_English.txt | README file containing a list of fixes and improvements since the last major release (in English). |
| 4 | Sindy.exe | Sindy executable file. |
| 5 | Sindy_rus_helper.chm | Context-sensitive help file in Microsoft HTMLHelp format. |
| 6 | Sindy_userguide_rus.pdf | User Guide (this document) in PDF format. |
| 7 | unins000.dat, unins000.exe | Files used to uninstall Sindy at the user’s request. |
| 8 | update120.dll, update142.dll | Dynamic libraries containing functionality for updating project files created in older versions. |
1.4.Contact Information
LeDiS Group contact details for technical support of registered users:
- Email:
This email address is being protected from spambots. You need JavaScript enabled to view it. - Phone: +7 (495) 943-1945
- Website: http://www.ledisgroup.com
1.5.How to Register
To purchase the program, visit the LeDiS Group website at:
http://www.ledisgroup.com/rus/educationpro/form.php
There you can review the product price and available payment options.
Within 2–3 days after payment, registration details and activation instructions will be sent to the email address that you must provide to LeDiS Group.
If you have any questions, please contact LeDiS Group Technical Support using the contact information.
2.Quick Start
2.1.Installing the Program
To install Sindy, you must have sufficient permissions on the personal computer to modify data in system folders. If you do not have such permissions, contact the computer administrator, who can assist with the installation.
To install the program:
- Run the distribution file sindy_rus_x_x_x.exe.
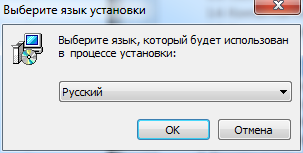
- Select the language of the installation program (this setting is used only for the Sindy installation procedure) and click OK. All subsequent installation steps shown below assume that “Russian” has been selected from the drop-down list in the next window.
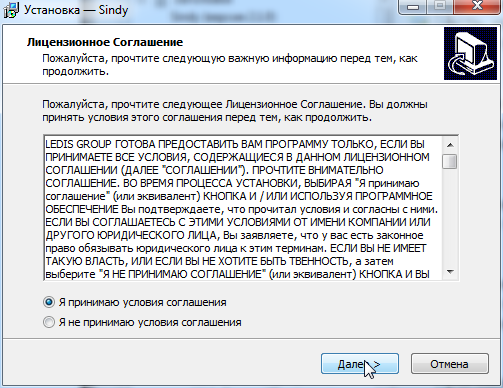
- In the license confirmation window, carefully read the terms defining the agreement between the user and the manufacturer of this software (LeDiS Group). If you do not agree with the license agreement, select “I do not accept the agreement” and click “Next”, or terminate the installation procedure by clicking “Cancel”. If you fully accept the license terms, select “I accept the agreement” and click “Next”.
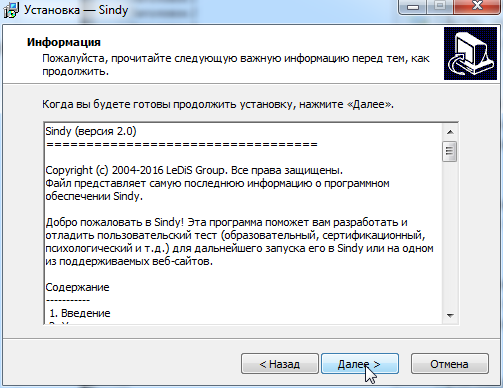
- Carefully read the information shown in the next window and click “Next”.
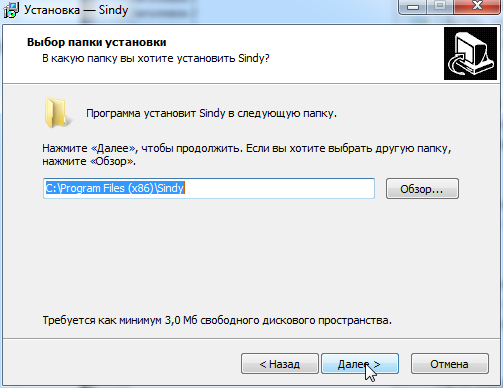
- Use the “Browse” button to select the computer folder where the program should be installed if you do not want to use the default folder, or leave it unchanged. Click “Next”.
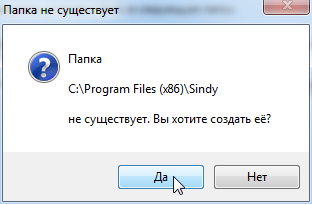
- If the specified folder does not exist, confirm its creation by clicking “Yes”.
- Specify the program group name if you do not want to use the default name, or leave it unchanged. Click “Next”.
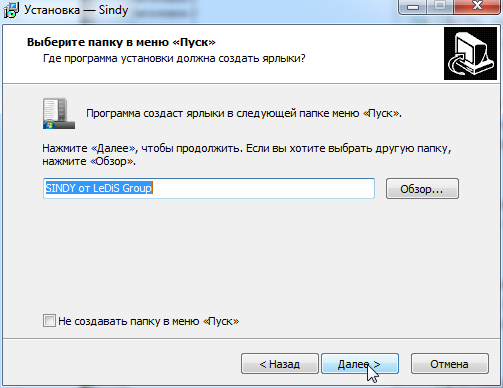
You can also select “Do not create a Start Menu folder” if you do not need a Sindy program group on the computer.
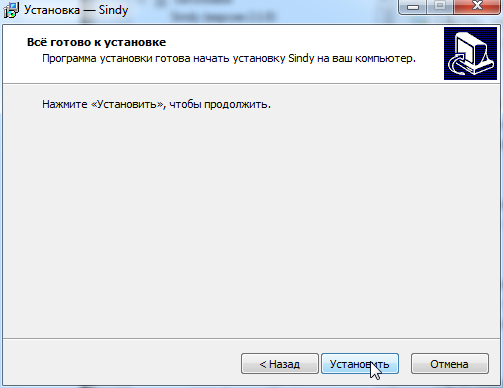
- Confirm the start of the actual installation of Sindy on the computer by clicking “Install”.
- Wait until the installation program has completely installed Sindy.
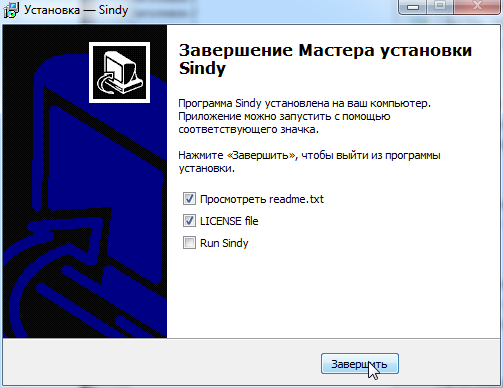
- In the installation completion window, select “View readme.txt” if you want to open the document containing additional information about Sindy after installation is complete. To open the license agreement, select “LICENSE file”. Select “Launch Sindy” if you want to start Sindy immediately after installation. Click “Finish” to complete the installation procedure.
- You have successfully installed Sindy on your computer.
2.2.Starting the Program
To start Sindy, locate the program group specified during installation in the Start menu. In this program group, launch the program named “Sindy”. If creation of the program group was disabled, run the “sindy.exe” file from the folder where the program was installed.
When the program starts, an informational splash screen is displayed briefly.

Immediately after the splash screen appears, the Sindy main window opens.
2.3.Exiting the Program
To exit Sindy, perform one of the following actions:
- Select the main menu item “File -> Exit”
- Use the keyboard shortcut CTRL-E
- Use the keyboard shortcut ALT-F4
- Click the icon

in the upper-right corner of the program’s main window
If you exit the program while a project containing unsaved changes is open, you will be prompted to save those changes.
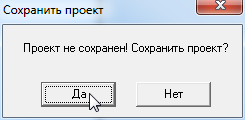
Clicking “Yes” saves the changes to the current project file or starts a special wizard that can be used to create a new project file. Clicking “No” discards changes made since the last time the project was saved or opened. In both cases, after all intermediate operations are completed, the program closes.
2.4.Getting Help
For information on working with Sindy, it is recommended to use:
- The User Guide (this document)
- Context-sensitive help, which can be opened by pressing F1 while working in the program or by selecting “Help -> Help” from the menu
- Information published on the ledisgroup.com website
2.5.System Requirements
Sindy is a 32-bit Windows application. If 32-bit applications are supported, the program can also be used in a 64-bit environment.
Hardware requirements: PC-compatible computer, at least 8 MB of available RAM, at least 10 MB of free hard disk space (HDD), keyboard, mouse, monitor.
Software requirements: 32/64-bit Windows operating system (Windows 98, Windows NT, Windows 2000, Windows Me, Windows XP, Windows Vista, Windows 7,8). Microsoft Internet Explorer (version 5.0 or later) is recommended.
3.Theoretical Foundations
3.1.Main Types of Tests
Sindy can be used to create a wide variety of tests. Each test is defined by a set of standard objects that determine the test structure and its behavior after launch. In general, a test consists of lists of questions and related answers from which the test taker selects the most appropriate options. Other test objects, including scales, interpretations, and weights, define the mechanism for calculating test results.
Additional settings can be defined for any test and question to adapt the testing process to specific conditions. These additional settings include:
- The direction of movement through test questions can be set to one of the following options:
- Forward sequentially through the test questions (all questions are displayed in strict sequence according to the order established when the test was constructed)
- Forward and backward sequentially through the test questions (all questions are displayed in strict sequence according to the order established when the test was constructed, but it is also possible to return from the current question to previous questions)
- Free navigation to any test question (it is possible to jump directly to any question from the available list of questions)
- Previously displayed test questions can be allowed to repeat or repetition can be prohibited during testing
- Selection of more than one answer for a particular question can be allowed or prohibited during testing
- The test taker can be required to select at least one answer for every question during testing
3.2.Principles of Test Construction
To use Sindy effectively, it is necessary to understand the basic principles of test construction, which are quite simple. Test objects are related as follows:
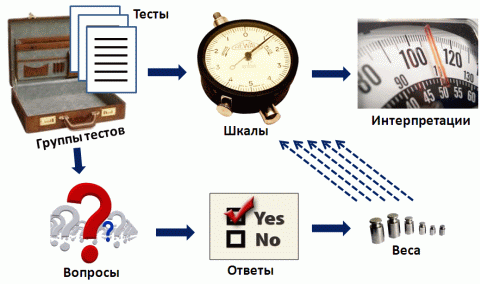
All tests are organized into user-created groups to make it easier to work with large numbers of tests. Any group can contain any number of tests.
Each test must contain questions, which are then shown to respondents during testing according to the principle of one question per screen. Any number of answers can be associated with each question, and the test taker selects from them when answering the question.
Weights (or weight values) are assigned to answers and determine the degree to which a particular answer affects the final result on a predefined scale.
Any test can have one or more scales reflecting individual characteristics whose combination is identified during testing. For example, you can develop a comprehensive physics entrance examination for admission to a higher education institution, with scales such as “General Physics”, “Electromagnetic Phenomena”, “Nuclear Physics”, etc. The test results would then be the scores obtained on each scale.
For automated evaluation of test results, interpretations must be defined. An interpretation is a standard statement or description selected when a test result falls within a predefined portion of the range of possible values on a scale.
An important feature of Sindy is that a test can be developed in which any answer affects different test scales with different weights. This is achieved by creating several weights that directly link such answers and scales. Thus, more than one weight value can be associated with an answer, but no more than the number of scales in the test.
4.Sindy Program Interface
4.1.Main Program Windows and Dialogs
Sindy is a window-based application designed to run in Microsoft Windows. The program is based on the MDI (Multiple Document Interface) standard and, in accordance with this standard, has one main window displayed immediately after the program starts. While working with the main window, multiple child windows can be created in which tests are run (or testing is performed). In other words, several tests can be run simultaneously, each in a separate MDI window.
In addition, while working with Sindy, additional dialog windows providing extended functions are sometimes opened. The program includes the following most important dialog windows:
A number of other windows are also implemented for various program functions. In particular, these include the project management windows and the Test Builder.
In addition to dialog windows, there are confirmation dialogs for particular actions:
- Dialog “Confirm saving project”
- Dialog “Confirm deleting object”
- “Confirm deleting child objects” dialog
- “Confirm updating project file” dialog
4.1.1.Main and Child Program Windows
The main window provides access to all program functions. It includes the following key areas:
- Control panel, which includes the main menu and configurable toolbar
- Test Builder — the left vertical panel of the program, displaying a tree of nodes containing test objects
- Test Player — the right-hand area in which MDI child windows for running tests appear
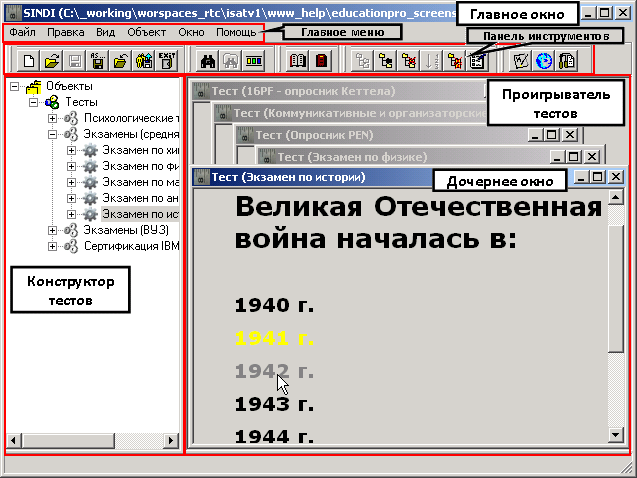
The control panel provides access to the various Sindy functions.
The Test Builder is the primary means of accessing test data and adding new data, as well as modifying and deleting existing data. All data in the Test Builder is displayed hierarchically as nodes, most of which represent various test objects. The hierarchy of test objects is built according to predefined architectural rules.
To populate the Test Builder correctly, you can use such graphical user interface elements as the main and context menus, as well as the toolbar. Keep in mind that when nodes of different types are activated in the Test Builder, the visibility and availability of various interface elements may change.
A test created with the Test Builder can be launched in the Test Player as a separate child window.
Remember that any test in the Test Builder can be launched in the Test Player only once at any particular time. At the same time, any number of different tests can be running simultaneously.
In some cases, it may be useful to expand the child window of a running test to full screen, which makes it possible to eliminate the influence of unrelated elements on the testing process. Note that no more than one child window can be displayed full screen at any one time. To expand the child window of another test, first restore the previously expanded window to the application level and then expand the other one.
4.1.2.“Toolbar Settings” Window
The “Toolbar Settings” window can be opened from the main window using the menu “Edit → Toolbars → Toolbar Settings”.
This window is used to change the visibility of individual toolbar groups in Sindy.
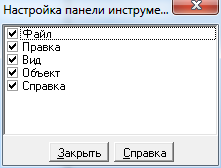
A check mark before the name of a toolbar group means that the group is visible and its buttons can be used to invoke Sindy functions. To hide a group, simply click the check mark with the left mouse button so that it disappears.
Five toolbar groups are available in the program, duplicating some of the functions of the main menu:
- File
- Edit
- View
- Object
- Help
To exit the “Toolbar Settings” window, click “Close”.
4.1.3.“About” Window
The “About” window can be opened using the menu “Help → About”.
This window provides additional information about Sindy, including the full release number, links to the LeDiS Group website, a link for sending an email to Technical Support, and other information.
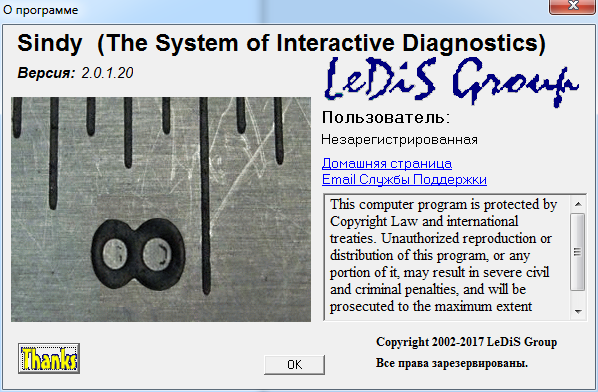
To open the developer’s website in a browser, left-click the “Home Page” link. To open the default email program and send an email to LeDiS Group Technical Support, left-click the “Support Email” link.
Clicking the “Thanks” button opens the auxiliary “Acknowledgements” window, listing third-party components and software used in the development of Sindy.
Click OK to close this window.
4.1.4.“Confirm Saving Project” Dialog
This confirmation dialog opens when a project containing unsaved changes is closed. For example, this occurs when you try to exit the program while a project in which test objects have been modified is still open.
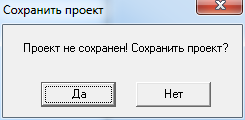
To confirm saving the project to the project file, click “Yes”; to discard changes made since the previous save or since the project was opened, click “No”. In both cases the project will be closed.
4.1.5.“Confirm Deleting Object” Dialog
This dialog opens when any test element is deleted using the main menu “Object → Delete ...” or the corresponding context menu in the Test Builder. For example, when deleting a test group using the “Delete test group” context menu command, the program asks you to confirm the operation.
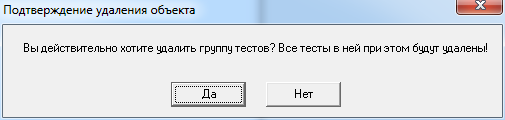
The exact message displayed in this dialog depends on the type of test element being deleted. Accordingly, a similar window also appears to confirm deletion of a test, question, answer, weight, scale, or interpretation.
To confirm deletion of the test object from the project, click “Yes”; to cancel deletion, click “No”.
4.1.6.“Confirm Deleting Child Objects” Dialog
This dialog opens when all child objects of any test object are deleted using the main menu “Object → Delete all ...” or the corresponding context menu in the Test Builder. The parent test object itself remains unchanged.
For example, this can be used to delete all tests from a test group using the “Delete all tests” context menu command. The program asks you to confirm this operation.
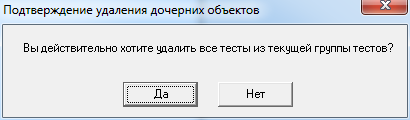
The exact message displayed in this dialog depends on the type of selected object whose child objects are being deleted.
To confirm deletion of the child objects from the project, click “Yes”; to cancel deletion, click “No”.
4.1.7.“Confirm Updating Project File” Dialog
This dialog opens when a project file created in an older version of Sindy is opened.
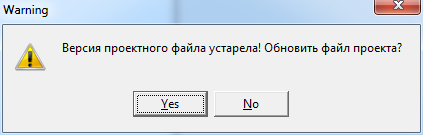
Once confirmed, this operation cannot be undone and the project file will be updated. Therefore, when this window appears with a prompt to update the project file, it is strongly recommended to immediately make a copy of the file being opened using the standard operating-system functions and only then confirm the update.
To confirm updating the project file, click “Yes”; to cancel, click “No”.
4.2.Main Menu
The Sindy main menu includes the following groups: “File”, “Edit”, “View”, “Object”, “Window”, and “Help”. Clicking a menu group heading opens its contents, which consist of various menu items, each associated with a predefined program function.
The “File” group of the main menu combines general project management operations, test import/export, and exiting the program.
Table 2. Main menu items in the “File” group
| Menu item | Description |
| New | Create a new empty project. |
| Open | Open a project saved in a project file. |
| Save | Save the open project to the current project file. This menu item is available only if changes have been made to the project currently open in the program using the Test Builder. |
| Save As… | Save the open project to a new project file, which will be created or replaced. This menu item is available only when a project is open. |
| Close | Close the project currently open in the program. This menu item is available only when a project is open. |
| Import Test... | Import a test into the project from EDT-format files. This menu item is available only when a project is open. |
| Export Test... | Export a test to an EDT-format file. The test is selected in an additional dialog window. This menu item is available only when a project is open. |
| Exit | Exit the program. |
The “Edit” group of the main menu includes operations for searching for test objects in the Test Builder, copying and pasting via the Windows Clipboard, and toolbar settings.
Table 3. Main menu items in the “Edit” group
| Menu item | Description |
| Find… | Find a node in the Test Builder node tree by specifying search criteria. This menu item is available only when a project is open. |
| Find Next | Find the next node in the Test Builder using the previous search criteria. This menu item is available only when a project is open and only if a search with specified criteria has already been performed. |
| Cut | Cut a test object to the Windows Clipboard for subsequent insertion elsewhere in the Test Builder. This menu item is available only when a project is open and only if a test group, test, question, answer, weight, scale, or interpretation object is selected. |
| Copy | Copy a test object to the Windows Clipboard for subsequent insertion elsewhere in the Test Builder. This menu item is available only when a project is open and only if a test group, test, question, answer, weight, scale, or interpretation object is selected. |
| Paste | Paste a test object if it was previously cut or copied to the Windows Clipboard. This menu item is available only when a project is open and only if an appropriate object is selected in the Test Builder (for example, a test can be pasted only into a test group, etc.). |
| Toolbars | Control the visibility of individual toolbars. |
The “View” group of the main menu includes operations for expanding and collapsing the hierarchical tree structure in the Test Builder. All items in this menu are available only when a project is open.
Table 4. Main menu items in the “View” group
| Menu item | Description |
| Show All Child Objects | Recursively expand all objects in the Test Builder for the selected node. |
| Hide All Child Objects | Recursively collapse all objects in the Test Builder for the selected node. |
The “Object” group of the main menu combines basic operations for constructing and launching tests, as well as arranging test elements. All items in this menu are available only when a project is open.
Table 5. Main menu items in the “Object” group
| Menu item | Description |
| Create | Create a new test object in the Test Builder as a child of the selected object. The name and availability of this menu item are determined by the type of the selected node. |
| Edit | Edit an existing test object represented by the selected node in the Test Builder. The name and availability of this menu item are determined by the type of the selected node. |
| Delete | Delete an existing test object represented by the selected node in the Test Builder. The name and availability of this menu item are determined by the type of the selected node. |
| Arrange “objects”… | Change the order of test objects in the Test Builder that are children of the selected node object. The name and availability of this menu item are determined by the type of the selected node. |
| Delete all “child objects” | Delete all test objects in the Test Builder that are children of the selected node element. The name and availability of this menu item are determined by the type of the selected node. |
| Run Test | Run a test in a child window of the Test Player. This menu item is available if any test is currently selected in the Test Builder. |
The “Window” group of the main menu includes operations for arranging and switching between child windows of the Test Player.
Table 6. Main menu items in the “Window” group
| Menu item | Description |
| Cascade | Arrange all existing Test Player child windows in a cascade. |
| Tile | Arrange all existing Test Player child windows as tiles. |
The “Help” group of the main menu provides access to help and additional information and makes it possible to contact Technical Support by email.
Table 7. Main menu items in the “Help” group
| Menu item | Description |
| Help… | Open online help documentation in the default web browser. |
| Home Page | Open the LeDiS Group website, the developer of Sindy, in the default web browser. |
| Email Technical Support | Open the email program with the email address of the Sindy developer’s Technical Support service specified. |
| About… | Open an additional window containing information about the program version, developer details, and other information related to Sindy. |
4.3.Toolbar
The Sindy toolbar consists of movable auxiliary panels with buttons and provides quick access to the program’s main functions. For convenience, toolbar buttons have unique icons and tooltips that make it easy to understand their function.
The toolbar structure largely mirrors the structure of the main menu. The toolbar is likewise divided into similar groups: “File”, “Edit”, “View”, “Object”, and “Help”.
The “File” toolbar group combines general project management operations, test import/export, and exiting the program.
Table 8. Toolbar items in the “File” group
| Toolbar button | Icon | Description |
| Create Project |  |
Create a new empty project. |
| Open Project |  |
Open a project saved in a project file. |
| Save Project |  |
Save the open project to the current project file. This toolbar button is available only if changes have been made to the project currently open in the program using the Test Builder. |
| Save Project As… |  |
Save the open project to a new project file, which will be created or replaced. This toolbar button is available only if a project is open in the program. |
| Close Project |  |
Close the project currently open in the program. This toolbar button is available only when a project is open. |
| Import Test from File |  |
Import tests into the project from specially prepared XML files. This toolbar button is available only when a project is open. |
| Export Test to File |  |
Export a test to an EDT-format file. The test is selected in an additional dialog window. This toolbar button is available only when a project is open. |
| Exit |  |
Exit the program. |
The “Edit” toolbar group includes operations for searching for test objects in the Test Builder and configuring the toolbar.
Table 9. Toolbar items in the “Edit” group
| Toolbar button | Icon | Description |
| Find… |  |
Find a node in the Test Builder node tree by specifying search criteria. This toolbar button is available only when a project is open. |
| Find Next |  |
Find the next node in the Test Builder using the previous search criteria. This toolbar button is available only when a project is open and only if a search with specified criteria has already been performed. |
| Toolbars |  |
Control the visibility of individual toolbars. |
The “View” toolbar group includes operations for expanding and collapsing the hierarchical tree structure in the Test Builder. All items in this menu are available only when a project is open.
Table 10. Toolbar items in the “View” group
| Toolbar button | Icon | Description |
| Show All Child Objects |  |
Recursively expand all objects in the Test Builder. |
| Hide All Child Objects |  |
Recursively collapse all objects in the Test Builder. |
The “Object” toolbar group combines basic operations for constructing and launching tests, as well as arranging test elements. All items in this menu are available only when a project is open.
Table 11. Toolbar items in the “Object” group
| Toolbar button | Icon | Description |
| Create |  |
Create a new test object in the Test Builder as a child of the selected object. The name and availability of this menu item are determined by the type of the selected node. |
| Edit |  |
Edit an existing test object represented by the selected node in the Test Builder. The name and availability of this menu item are determined by the type of the selected node. |
| Delete |  |
Delete an existing test object represented by the selected node in the Test Builder. The name and availability of this menu item are determined by the type of the selected node. |
| Arrange Objects… |  |
Change the order of test objects in the Test Builder that are children of the selected node object. The name and availability of this menu item are determined by the type of the selected node. |
| Delete All “Child Objects” |  |
Delete all test objects in the Test Builder that are children of the selected node element. The name and availability of this menu item are determined by the type of the selected node. |
| Run Test |  |
Run a test in a child window of the Test Player. This menu item is available if any test is currently selected in the Test Builder. |
The “Help” toolbar group provides access to help and additional information and makes it possible to contact Technical Support by email.
Table 12. Toolbar items in the “Help” group
| Toolbar button | Icon | Description |
| Help… |  |
Open online help documentation in the default web browser. |
| Home Page |  |
Open the LeDiS Group website, the developer of Sindy, in the default web browser. |
| Email Support |  |
Open the email program with the email address of the Sindy developer’s Technical Support service specified. |
4.4.Keyboard Shortcuts
Keyboard shortcuts partially duplicate menu items and make it possible to invoke the program’s main functions more quickly. Their only disadvantage is the need to remember the predefined key combinations assigned to these functions.
Sindy keyboard shortcuts can also be divided into groups: shortcuts for the main window, shortcuts for the Test Builder, and shortcuts for the Test Player.
Main-window keyboard shortcuts are standard for Microsoft Windows operating systems.
Table 13. Main-window keyboard shortcuts
| Keyboard shortcut | Action | Description |
| ALT-F4 | Press the ALT and F4 keys simultaneously | Exit Sindy by closing the application’s main window. If the program is closed while a project containing unsaved changes is open, you will additionally be prompted to save them. If tests are currently running in the program, you will be prompted to terminate testing for each of them. |
| CTRL-N | Press the CTRL and C keys simultaneously | Create a new empty project. |
| CTRL-E | Press the CTRL and E keys simultaneously | This key combination performs exactly the same action as the ALT-F4 keyboard shortcut. |
| CTRL-F | Press the CTRL and F keys simultaneously | Find a node in the Test Builder node tree by specifying search criteria. This key combination is available only when a project is open. |
| CTRL-I | Press the CTRL and I keys simultaneously | Import a test into the project from EDT-format files. This key combination is available only when a project is open. |
| CTRL-O | Press the CTRL and O keys simultaneously | Open a project saved in a project file. |
| CTRL-S | Press the CTRL and S keys simultaneously | Save the open project to the current project file. This key combination is available only if changes have been made to the project currently open in the program using the Test Builder. |
| F3 | Press the F3 key | Find the next node in the Test Builder using the previous search criteria. This key is available only when a project is open and only if a search with specified criteria has already been performed. |
| TAB | Press the keyboard Tab key | Move between graphical user interface elements in Sindy. |
Test Builder keyboard shortcuts make it possible to modify user data of test objects in open projects. This type of keyboard shortcut works only when one of the nodes in the Test Builder is selected.
Table 14. Test Builder keyboard shortcuts
| “Keyboard shortcut” | Action | Description |
| CTRL-ALT-S | Press the CTRL, ALT, and S keys simultaneously | Recursively expand all objects in the Test Builder for the selected node. |
| CTRL-ALT-H | Press the CTRL, ALT, and H keys simultaneously | Recursively collapse all objects in the Test Builder for the selected node. |
| CTRL-C | Press the CTRL and C keys simultaneously | Copy a test object to the Windows Clipboard for subsequent insertion elsewhere in the Test Builder. This menu item is available only when a project is open and only if a test group, test, question, answer, weight, scale, or interpretation object is selected. |
| CTRL-P | Press the CTRL and P keys simultaneously | Paste a test object if it was previously cut or copied to the Windows Clipboard. This menu item is available only when a project is open and only if an appropriate object is selected in the Test Builder (for example, a test can be pasted only into a test group, etc.). |
| CTRL-X | Press the CTRL and X keys simultaneously | Cut a test object to the Windows Clipboard for subsequent insertion elsewhere in the Test Builder. This menu item is available only when a project is open and only if a test group, test, question, answer, weight, scale, or interpretation object is selected. |
| Home | Press the Home key | Go to the very first node in the Test Builder node tree. |
| End | Press the End key | Go to the last node currently expanded in the Test Builder node tree. |
| Page Down | Press the PgDn key | Go to the next node one page below the selected node (one page is equal to the number of nodes currently displayed in the tree), or to the last open node if there are only a few objects. |
| Page Up | Press the PgUp key | Go to the previous node one page above the selected node (one page is equal to the number of nodes currently displayed in the tree), or to the first node if there are only a few objects. |
| SHIFT-Del | Press the SHIFT and Del keys simultaneously | Delete the test element represented by the selected node in the node tree. This key combination is available only if the selected tree node represents one of the direct test elements. |
| SHIFT-Enter | Press the SHIFT and Enter keys simultaneously | Edit the test element represented by the selected node in the node tree. This key combination is available only if the selected tree node represents one of the direct test elements. |
| SHIFT-Ins | Press the SHIFT and Ins keys simultaneously | Create a new test element that is a child of the element corresponding to the selected node in the node tree. This key combination is available only if the selected tree node represents one of the direct test elements. |
| Up Arrow | Press the Up Arrow key | Go to the node above the selected node that is currently shown in the node tree. |
| Left Arrow | Press the Left Arrow key | Expand the child elements of the selected node if they are hidden, or go to the first child node if they are already expanded. |
| Down Arrow | Press the Down Arrow key | Go to the node below the selected node that is currently shown in the node tree. |
| Right Arrow | Press the Right Arrow key | Hide the child elements of the selected node if they are expanded, or go to the parent node if they are hidden. |
Test Player keyboard shortcuts assist with launching tests and performing testing procedures and operate within the active child window of a running test.
Table 15. Test Player keyboard shortcuts
| Keyboard shortcut | Action | Description |
| ENTER | Press the ENTER key | Select or deselect the current answer if the current element on the test screen is an answer. If the current element is a navigation button, move to another test screen according to that button. |
| TAB | Press the keyboard Tab key | Make the next answer or navigation button the current element on the test screen. If the last navigation button has been reached, focus moves to the first answer for the current question. |
| SHIFT-B | Press the SHIFT and B keys simultaneously | Go to the previous test question according to the predefined question order. This keyboard shortcut is available only if backward movement through questions is permitted in the current test. |
| SHIFT-N | Press the SHIFT and N keys simultaneously | Go to the next test question according to the predefined question order. |
| SPACE | Press the Space key | This key performs the same action as the ENTER key. |
| Up Arrow | Press the Up Arrow key | Go to the previous answer. If the first answer to the question has been reached, go to the last answer. |
| Left Arrow | Press the Left Arrow key | This key performs the same action as the Up Arrow key. |
| Down Arrow | Press the Down Arrow key | Go to the next answer. If the last answer to the question has been reached, go to the first answer. |
| Right Arrow | Press the Right Arrow key | This key performs the same action as the Down Arrow key. |
4.5.Context Menus
Some graphical user interface elements have context menus that simplify access to available Sindy functions. The context menu of an interface element opens when the right mouse button is clicked while the pointer is over that element. Separate context menus are defined for nodes of the Test Builder, child windows of the Test Player, and the test object arrangement window.
The Test Builder context menu provides quick access to operations on individual nodes.
Table 16. Context menu for Test Builder nodes
| Context menu item | Description |
| Create | Create a new test object in the Test Builder as a child of the object represented by the selected node. The name and availability of this context menu item are determined by the type of the selected node in the Test Builder. |
| Edit | Edit an existing test object represented by the selected node in the Test Builder. The name and availability of this context menu item are determined by the type of the selected node in the Test Builder. |
| Delete | Delete an existing test object represented by the selected node in the Test Builder. The name and availability of this context menu item are determined by the type of the selected node in the Test Builder. |
| Arrange Objects… | Change the order of test objects in the Test Builder that are children of the selected node object. The name and availability of this menu item are determined by the type of the selected node. |
| Delete All “Child Objects” | Delete all test objects in the Test Builder that are children of the selected node element. The name and availability of this menu item are determined by the type of the selected node. |
| Run Test | Run a test in a child window of the Test Player. This menu item is available if any test is currently selected in the Test Builder. |
The context menu for Test Player child windows makes it possible to perform program functions during testing and create reports when testing is complete.
Table 17. Context menu for Test Player child windows
| Context menu item | Description |
| Next | Go to the next test question according to the predefined question order. |
| Close | Close the current Test Player window, completely terminating the testing procedure. |
| Back | Go to the previous test question according to the predefined question order. This context menu item is available only if backward movement through questions is permitted in the current test. |
| Stop | This function will be implemented in future releases of Sindy. |
| Pause | This function will be implemented in future releases of Sindy. |
| Go To | This menu item can contain additional child menu items, each corresponding to a particular test question. This menu item is used only if the test allows free navigation to any question. |
| Show Test Protocol | Create the Test Protocol. This context menu item is available only on the final testing screen if all questions requiring an answer have been answered. |
| Show Test Results | Create the Test Results Report. This context menu item is available only on the final testing screen if all questions requiring an answer have been answered. |
| Continue | This function will be implemented in future releases of Sindy. |
| Expand to Full Screen | Expand the child window of the running test to full screen. This context menu item is available only for Test Player child windows. |
| Restore to Program | Restore the expanded running-test window to the size of a Test Player child window. This context menu item is available only for a running-test window that has been expanded to full screen. |
The context menu for the test object arrangement window provides additional access to program operations that can be used to change the order of these objects.
Table 18. Context menu for the test object arrangement window
| Context menu item | Description |
| Select All Objects | Select all objects displayed in the arrangement window at once. |
| Deselect All Objects | Deselect all objects displayed in the arrangement window at once. |
| Move All to End | Move all selected objects to the end of the list while preserving their current order relative to one another. |
| Move All to Beginning | Move all selected objects to the beginning of the list while preserving their current order relative to one another. |
| Move All One Position Up | Move each selected object one position up while preserving the current order of the selected objects relative to one another. |
| Move All One Position Down | Move each selected object one position down while preserving the current order of the selected objects relative to one another. |
4.6.Tooltips
A number of Sindy graphical user interface elements have so-called tooltips that display additional information about the purpose of these elements.
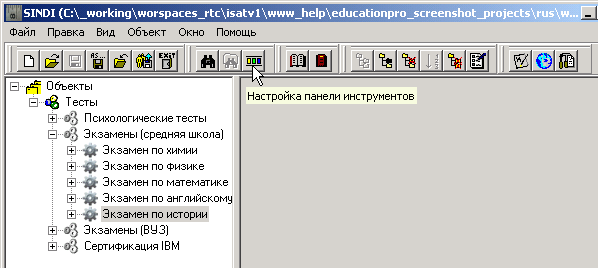
To display such a tooltip, move the mouse pointer over the corresponding user-interface element (for example, a toolbar button) and hold the pointer over the element for a few moments. The tooltip appears for only a few seconds, but this is usually sufficient to read its contents and obtain information about the element’s function.
Note that subsequent movement of the mouse pointer hides the tooltip before it would otherwise disappear.
4.7.“Drag & Drop” Operations
Sindy supports dragging objects in the node tree of the Test Builder. This significantly simplifies arranging a small group of objects.
Keep in mind the following restrictions on this operation:
- Only one object can be moved at a time using “Drag & Drop”
- Objects can be dragged only within the same parent object
When a test object is dragged, the mouse pointer changes. If the mouse pointer looks like 
, the selected object can be moved to that location. If the pointer looks like  , the object cannot be moved to that location.
Using “Drag & Drop”, you can move:
- A test group within the “Tests” node
- A test within a particular test group
- A scale within the “Scales and Interpretations” node of a particular test
- An interpretation within a particular scale
- A question within the “Questions and Answers” node of a particular test
- An answer within a particular question
- A weight within a particular answer
To drag a test object, perform the following actions:
- Left-click the node of the object to be moved in the Test Builder node tree
- Without releasing the left mouse button, begin moving the selected object to a new position (note the change in the mouse pointer)
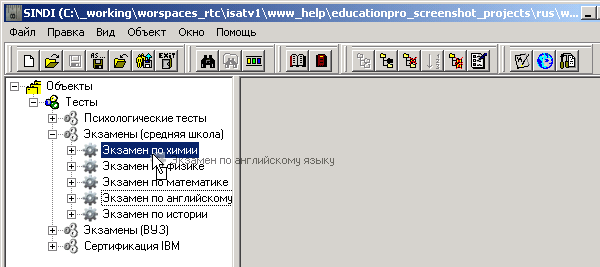
- Select the new position for the node being moved and release the left mouse button over it
Note that the object being moved takes the place of the object over which the mouse button is released. That object and all subsequent objects within the parent node are shifted down by one position.
Moving a test object to the end of a list can be somewhat more difficult. This is done in two stages: first, drop the object being moved onto the last object within the parent node (the moved object then becomes second-to-last), and then move the last object onto the position of the second-to-last object (the two last objects swap positions and the object being moved becomes the last one).
4.8.Data Exchange via the Windows Clipboard
The Clipboard is an intermediate data store used by Sindy to exchange data with external applications and also to move or copy test objects within Sindy itself.
Standard Clipboard operations such as cut, copy, and paste are used. When cutting, the source information is placed on the Windows Clipboard and is removed from its original location after a subsequent paste operation. Copying is similar to cutting, but the source information is not removed and is effectively duplicated after pasting. Pasting itself makes it possible to insert data from the Clipboard into a new destination in the program.
Data-exchange operations are available in Sindy text input fields. For example, you can cut or copy text data from the Internet Explorer web browser into the “Description” field of a particular test group.
In addition, when developing tests in Sindy, Clipboard operations can be used on nodes of the Test Builder. This can be useful for quickly populating a project with similar test objects. For example, if a test contains several dozen questions and each question has only the two answers “Yes” and “No”, it is sufficient to create these answers for only one question and then reproduce them for the others by copying them in the original question and pasting them into all the new questions.
An object from the Clipboard can be pasted an unlimited number of times. When information is cut or copied to the Clipboard, its previous contents are completely replaced by the new contents.
To perform data-exchange operations through the Windows Clipboard, you can use the main and context menu commands (“Cut”, “Copy”, and “Paste”), as well as keyboard shortcuts (CTRL-X, CTRL-C, and CTRL_V).
5.Project Management
5.1.General Information
While working in Sindy, the user can create, modify, or delete data. To make it possible to restore the workspace with user data at any time the next time the program starts, the program can save this data to project files and restore it from such files. The following operations are available to the user as part of project management:
- Creating a new project
- Opening an existing project
- Saving open-project data to the current project file
- Saving open-project data while specifying a project file
- Closing the open project
5.2.Creating a New Project
Creating a new project may be useful in various situations. For example, if you are just beginning to work with the program, the first thing you need to do is create a new project. If the current project has become too large because it contains many tests, however, it may sometimes be more convenient to create a new project and continue working with two projects in parallel.
In addition, you can create a new project containing only the tests relevant to certain users and then provide this project to those users for their work.
If a project containing unsaved user changes is already open when the function for creating a new project is invoked, the program prompts the user to save those changes before creating the new project.
A new project can be created using the main menu command “File → New” or the toolbar button
in the program’s main window.
5.3.Opening an Existing Project
Opening an existing project is necessary to restore the workspace from a project file and continue working with previously saved data.
If a project containing unsaved user changes is already open when the function for opening an existing project is invoked, the program prompts the user to save those changes before opening the new project.
When projects saved in older versions of Sindy are opened, you may be prompted to update the project file being opened. This operation is necessary because the format of saved data may change when new releases are issued as Sindy functionality is improved. An existing project can be opened using the main menu command “File → Open…” or the toolbar button
in the program’s main window. When a project is opened, the program displays the “Open Project” window.
The primary purpose of the “Open Project” window is to allow the user to select a particular previously saved project file and access its data.
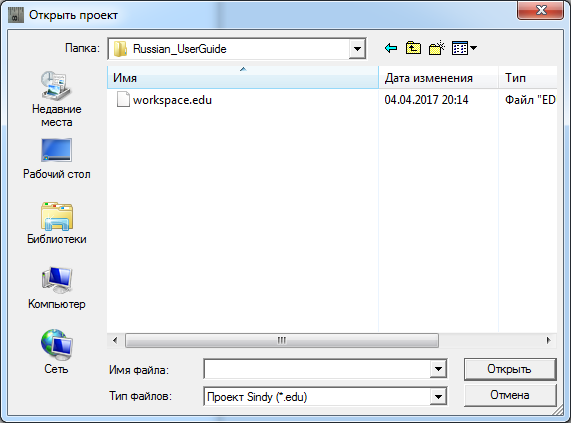
To open the required project file, specify its name in the “File name” field. You can enter the full path to the file or use the “Folder” drop-down list and the “Recent Places”, “Desktop”, “Libraries”, “Computer”, or “Network” buttons to locate the file. The “Files of type” drop-down list can be used to enable or disable file filtering by the standard file extension for Sindy projects.
Click “Open” to confirm opening the selected project file or “Cancel” to cancel the operation and close the current dialog.
5.4.Saving Open-Project Data to the Current Project File
Sindy makes it possible to save the data of an open project to the current special-format file with the EDU extension.
If the project-saving operation is invoked for a newly created project that has not yet been saved, the program automatically begins the operation of saving the open-project data while specifying a project file.
Open-project data can be saved to the current project file using the main menu command “File → Save” or the toolbar button
in the program’s main window.
5.5.Saving Open-Project Data While Specifying a Project File
Saving open-project data while specifying a project file may be necessary if you need to save the data of a newly created unsaved project or duplicate project data in a new project file.
When this operation is performed, the program prompts you to specify the name of the project file in which the changes should be saved.
It should be noted that this operation makes it possible to distribute tests you have created. To do this, simply save the current project to a new project file and then delete unnecessary data from the second project. The new file can then be provided to other users, who only need to open the project from that file to work with its data.
Open-project data can be saved while specifying a project file using the main menu command “File → Save As…” or the toolbar button
in the program’s main window.
The primary purpose of the “Save Project” window is to allow a particular file to be specified for saving the current project.
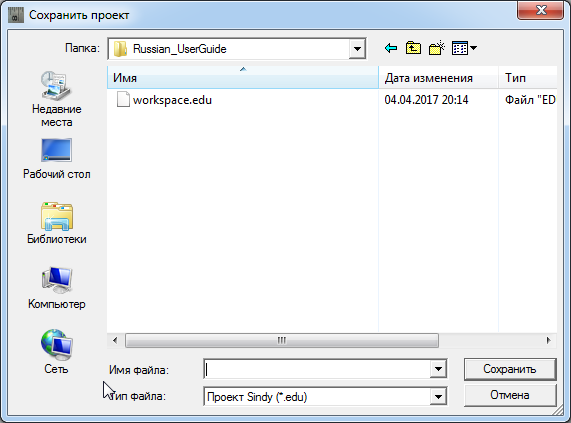
To save project data to a project file, specify its name in the “File name” field. You can enter the full path to the file or use the “Folder” drop-down list and the “Recent Places”, “Desktop”, “Libraries”, “Computer”, or “Network” buttons to locate the file. The “Files of type” drop-down list can be used to enable or disable file filtering by the standard file extension for Sindy projects.
Click “Open” to confirm saving the selected project file or “Cancel” to cancel the operation and close the current dialog.
If saving to an existing project file is confirmed, an additional “ ” dialog appears in which you must either confirm replacement of the selected file or cancel it.
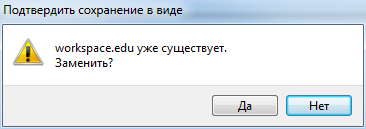
If a nonexistent project file is specified, the file is created and the current project data is saved to it.
5.6.Closing the Open Project
Closing the open project is used when you need to finish working with the current project.
If the project contains unsaved changes when the close-project function is invoked, the program prompts the user to save them before closing the project.
The open project can be closed using the main menu command “File → Close” or the toolbar button
in the program’s main window.
6.Test Builder
6.1.General Information
The full-featured Test Builder implemented in Sindy makes it possible to create various types of tests. It is recommended to create tests in the following sequence:
- Create one or more test groups, which makes it considerably easier to work with a large number of tests by dividing them into specific logical groups. For example, create test groups such as “Psychological Tests”, “Educational Tests”, “Certification Tests”, or define your own grouping rules.
Create the required test objects, define their properties, and prepare them to be populated with the remaining test objects. A mandatory Sindy rule is that each test must belong to exactly one predefined test group.
- Create test scales to measure individual characteristics whose combination is identified by the test.
- Create interpretations for each scale to implement a mechanism for automatically generating conclusions based on test results.
- Define questions in the test that will be presented to the user during testing.
- Create answers for each question that the user can select when the questions are presented.
- Create weights for answers that determine how strongly a particular answer affects the final result on a predefined scale.
In addition, the Test Builder provides the following useful functions:
- Changing the order of objects
- Deleting a group of objects
- Importing a test
- Exporting a test
- Searching for objects
6.2.Creating, Editing, and Deleting a Test Group
A test group makes it easier to work with a large number of tests by dividing them into logically related subsets.
A test group can be created, edited, or deleted only in a created or open project.
6.2.1.Creating and Editing a Test Group
The create-test-group operation not only creates a new group in the current project but also allows its properties to be defined. To start the create-test-group operation, use one of the following methods:
- Select the “Tests” node in the Test Builder node tree and activate the main menu command “Object → Create test group”.
- Select the “Tests” node in the Test Builder node tree and use the keyboard shortcut SHIFT-Ins.
- Select the “Tests” node in the Test Builder node tree and activate the context menu command “Create test group”.
- Select the “Tests” node in the Test Builder node tree and click the toolbar button
.
The edit-test-group operation does not create a new group in the current project; it only allows the properties of an existing group to be changed. To start the edit-test-group operation, likewise use one of the following methods:
- Select the node of the group to be edited in the Test Builder node tree and activate the main menu command “Object → Edit test group”.
- Select the node of the group to be edited in the Test Builder node tree and use the keyboard shortcut SHIFT-Enter.
- Select the node of the group to be edited in the Test Builder node tree and activate the context menu command “Edit test group”.
- Select the node of the group to be edited in the Test Builder node tree and click the toolbar button
.
The following properties are defined for every test group: “Name” and “Description”. The name is a required field and cannot be empty. It cannot exceed 255 characters and must occupy only one line. Unlike the name, the description is practically unlimited in length. The description can also consist of any number of paragraphs.
The name is always displayed in the Test Builder tree as the test-group node. The description is used by the user only for reference purposes to store additional information about the test group.
When the create-test-group operation is started, the program automatically fills in the “Name” field. However, the value of this field can be changed at any time.
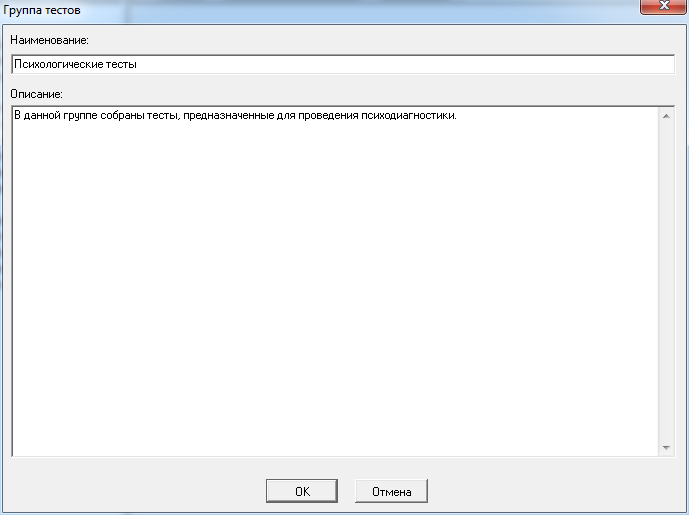
Specify the test-group properties in this window:
- In the “Name” field, enter a valid name for the test group that will be displayed in the Test Builder node tree.
- In the “Description” field, enter any useful information related to this test group.
To confirm the invoked operation, click OK. When creating a test group, a new test group is created; when editing, the new properties are saved for the selected test group.
To cancel the invoked operation, click “Cancel”. In both cases (creating and editing a test group), this closes the “Test Group” window and no test objects are created or modified.
6.2.2.Deleting a Test Group
The delete-test-group operation deletes the test group itself and recursively deletes all tests contained in that group together with all test objects belonging to those tests. To start the delete-test-group operation, use one of the following methods:
- Select the node of the group to be deleted in the Test Builder node tree and activate the main menu command “Object → Delete test group”.
- Select the node of the group to be deleted in the Test Builder node tree and use the keyboard shortcut SHIFT-Del.
- Select the node of the group to be deleted in the Test Builder node tree and activate the context menu command “Delete test group”.
- Select the node of the group to be deleted in the Test Builder node tree and click the toolbar button
.
To permanently delete the selected test group from the project, additional confirmation is required when prompted by Sindy.
6.3.Creating, Editing, and Deleting a Test
A test is the principal testing object that combines sets of logically related elements. A test defines its structure, testing rules, and result-evaluation criteria.
A test can be created, edited, or deleted only in a created or open project.
6.3.1.Creating and Editing a Test
The create-test operation not only creates a new test in the current project but also allows its properties to be defined. To start the create-test operation, use one of the following methods:
- Select the test-group node in which the new test is being created in the Test Builder node tree and activate the main menu command “Object → Create test”.
- Select the test-group node in which the new test is being created in the Test Builder node tree and use the keyboard shortcut SHIFT-Ins.
- Select the test-group node in which the new test is being created in the Test Builder node tree and activate the context menu command “Create test”.
- Select the test-group node in which the new test is being created in the Test Builder node tree and click the toolbar button
.
The edit-test operation does not create a new test in the current project; it only allows the properties of an existing test to be changed. To start the edit-test operation, likewise use one of the following methods:
- Select the node of the test to be edited in the Test Builder node tree and activate the main menu command “Object → Edit test”.
- Select the node of the test to be edited in the Test Builder node tree and use the keyboard shortcut SHIFT-Enter.
- Select the node of the test to be edited in the Test Builder node tree and activate the context menu command “Edit test”.
- Select the node of the test to be edited in the Test Builder node tree and click the toolbar button
.
The window for creating or editing a test contains a set of tabs on which special interface elements can be used to change test properties. In particular, the following tabs are defined: “Main”, “Annotation”, “Instructions”, and “Parameters”.
The following important properties are defined for every test: “Name” and “Description”. The name is a required field and cannot be empty. It cannot exceed 255 characters and must occupy only one line. Unlike the name, the description is practically unlimited in length. The description can also consist of any number of paragraphs.
The name is always displayed in the Test Builder tree as the test node. The description is used by the user only for reference purposes to store additional information about the test.
When the create-test operation is started, the program automatically fills in the “Name” field. However, the value of this field can be changed at any time.
On the “Main” tab, the following test properties can be changed:
- In the “Name” field, enter a valid name for the test that will be displayed in the Test Builder node tree.
- In the “Description” field, enter any useful information related to this test.
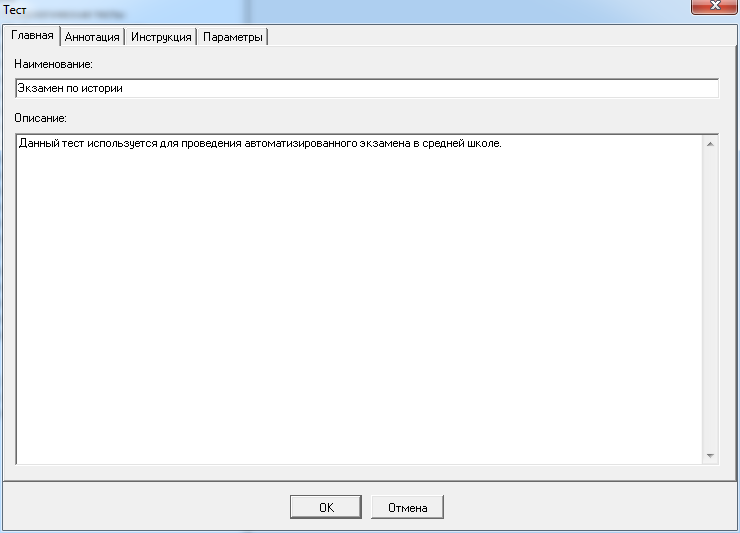
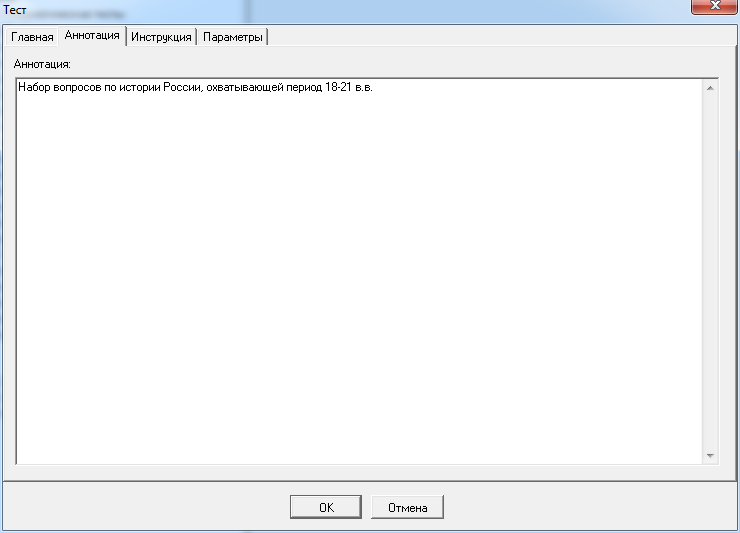
On the “Annotation” tab, enter specific information related to this test in the “Annotation” field. The test annotation is used by the user only for reference purposes.
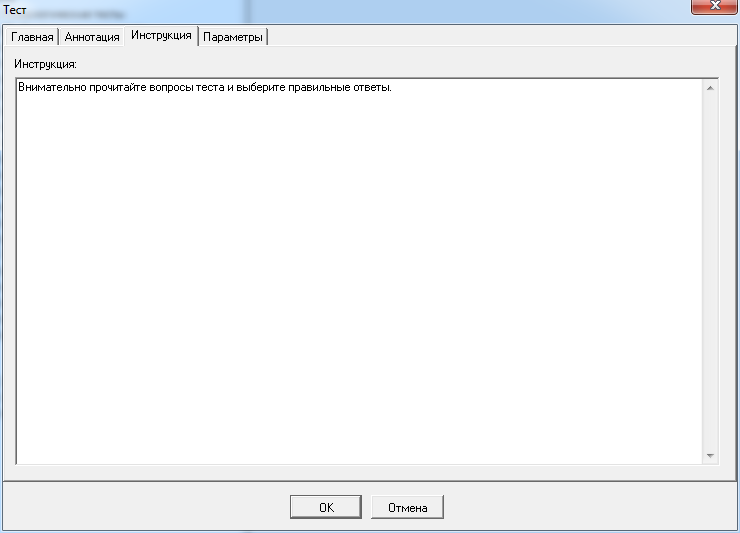
On the “Instructions” tab, enter in the “Instructions” field the information that will be displayed to the test taker in the first window of the running test.
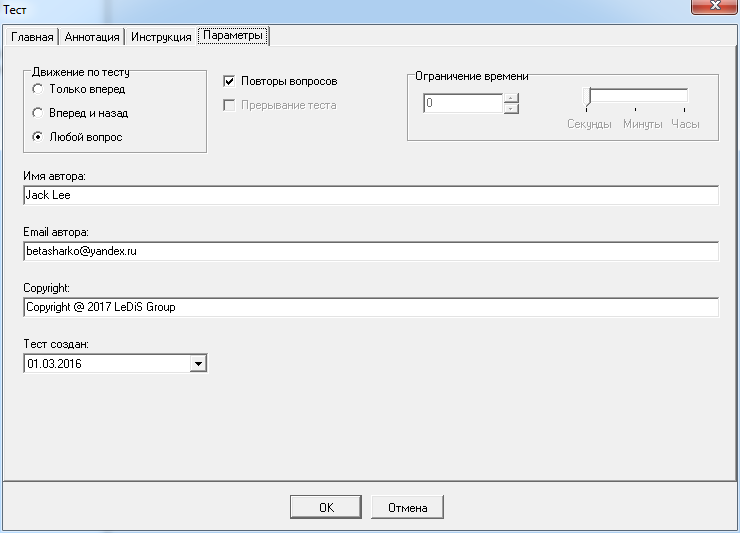
On the “Parameters” tab, the following test properties can be changed:
- For the “Test navigation” property group, activate one of the following options using the left mouse button or the arrow keys on the keyboard (use the Tab key to move to the active radio button in this group):
- The “Forward only” radio button if questions should be displayed sequentially from the first question to the last during testing according to their defined order.
- The “Forward and backward” radio button if questions should be displayed sequentially in both directions, forward and backward, during testing according to their defined order.
- The “Any question” radio button if the user should be able to move to any test question of their choice during testing.
- Activate the “Question repeats” checkbox using the left mouse button or the Space key (use the Tab key to move to this control) if, when the “Any question” radio button is active, it should be possible to return to questions that have already been completed. The “Question repeats” checkbox is available only when “Any question” test navigation is selected.
- Activate the “Test interruption” checkbox using the left mouse button or the Space key (use the Tab key to move to this control) if this test may be interrupted and resumed later at any time.
- Enter your name in the “Author name” field so that your name is displayed when this test is launched on the ledisgroup.com website.
- Enter your email in the “Author name” field; the test results will be sent to this address after a client completes this test on the ledisgroup.com website.
- Enter copyright information in the “Copyright” field to record your rights to this test.
- Specify the test development date in the “Test created” field.
To confirm the changes made to the test, click OK. When creating a test, a new test is created; when editing, the new properties are saved for the selected test.
To cancel the changes made to the test, click “Cancel”. In both cases (creating and editing a test), this only closes the “Test” window and no test objects are created or modified.
A test cannot be edited if it was imported into the project from a file to which it had previously been exported as private.
6.3.2.Deleting a Test
The delete-test operation deletes the test itself and recursively deletes all test objects contained in that test (scales, interpretations, questions, answers, and weights). To start the delete-test operation, use one of the following methods:
- Select the node of the test to be deleted in the Test Builder node tree and activate the main menu command “Object → Delete test”.
- Select the node of the test to be deleted in the Test Builder node tree and use the keyboard shortcut SHIFT-Del.
- Select the node of the test to be deleted in the Test Builder node tree and activate the context menu command “Delete test”.
- Select the node of the test to be deleted in the Test Builder node tree and click the toolbar button
.
To permanently delete the selected test from the project, additional confirmation is required when prompted by Sindy.
6.4.Creating, Editing, and Deleting a Scale
A scale reflects specific test characteristics whose combination is identified during testing.
A scale can be created, edited, or deleted only in a created or open project.
6.4.1.Creating and Editing a Scale
The create-scale operation not only creates a new scale in the current project but also allows its properties to be defined. To start the create-scale operation, use one of the following methods:
- Select the “Scales and Interpretations” node of a particular test in the Test Builder node tree and activate the main menu command “Object → Create scale”.
- Select the “Scales and Interpretations” node of a particular test in the Test Builder node tree and use the keyboard shortcut SHIFT-Ins.
- Select the “Scales and Interpretations” node of a particular test in the Test Builder node tree and activate the context menu command “Create scale”.
- Select the “Scales and Interpretations” node of a particular test in the Test Builder node tree and click the toolbar button
.
The edit-scale operation does not create a new scale in the current project; it only allows the properties of an existing scale to be changed. To start the edit-scale operation, likewise use one of the following methods:
- Select the node of the scale to be edited in the Test Builder node tree and activate the main menu command “Object -> Edit scale”.
- Select the node of the scale to be edited in the Test Builder node tree and use the keyboard shortcut SHIFT-Enter.
- Select the node of the scale to be edited in the Test Builder node tree and activate the context menu command “Edit scale”.
- Select the node of the scale to be edited in the Test Builder node tree and click the toolbar button
.
The following properties are defined for every scale: “Name” and “Description”. The name is a required field and cannot be empty. It cannot exceed 255 characters and must occupy only one line. Unlike the name, the description is practically unlimited in length. The description can also consist of any number of paragraphs.
The name is always displayed in the Test Builder tree as the scale node. The description is displayed in the test results if information has been entered in the corresponding field. Thus, extended information can be used to identify the scale. Otherwise, the scale name is used in the test results.
When the create-scale operation is started, the program automatically fills in the “Name” field. However, the value of this field can be changed at any time.
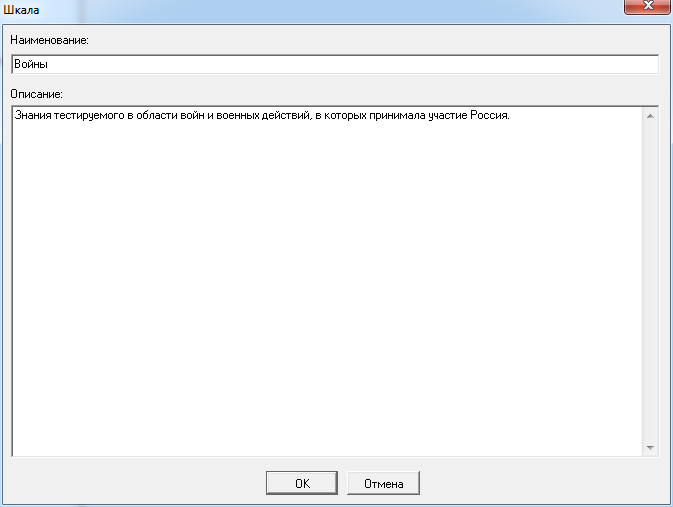
Specify the scale properties in this window:
- In the “Name” field, enter a valid scale name that will be displayed in the Test Builder node tree.
- In the “Description” field, enter any useful information related to this scale.
To confirm the invoked operation, click OK. When creating a scale, a new scale is created; when editing, the new properties are saved for the selected scale.
To cancel the invoked operation, click “Cancel”. In both cases (creating and editing a scale), this only closes the “Scale” window and no test objects are created or modified.
A scale cannot be edited in a test imported into the project from a file to which the test had previously been exported as private.
6.4.2.Deleting a Scale
The delete-scale operation deletes the scale itself and recursively deletes all interpretations contained in that scale. To start the delete-scale operation, use one of the following methods:
- Select the node of the scale to be deleted in the Test Builder node tree and activate the main menu command “Object → Delete scale”.
- Select the node of the scale to be deleted in the Test Builder node tree and use the keyboard shortcut SHIFT-Del.
- Select the node of the scale to be deleted in the Test Builder node tree and activate the context menu command “Delete scale”.
- Select the node of the scale to be deleted in the Test Builder node tree and click the toolbar button
.
Deleting a scale referenced by existing weights in the test changes the icons of those weights in the Test Builder node tree from the standard appearance 
to  . This means that the weight is dangling and is not used because no scale is defined for it. In this case, it is recommended to either define a new scale for this weight or delete the unnecessary weight.
To permanently delete the selected scale from the project, additional confirmation is required when prompted by Sindy.
6.5.Creating, Editing, and Deleting an Interpretation
Interpretations are used for automated evaluation of test results. They are displayed as statements of test results when a result falls within a particular predefined part of a scale’s numeric range.
An interpretation can be created, edited, or deleted only in a created or open project.
6.5.1.Creating and Editing an Interpretation
The create-interpretation operation not only creates a new interpretation in the current project but also allows its properties to be defined. To start the create-interpretation operation, use one of the following methods:
- Select the node of a particular scale in the Test Builder node tree and activate the main menu command “Object → Create interpretation”.
- Select the node of a particular scale in the Test Builder node tree and use the keyboard shortcut SHIFT-Ins.
- Select the node of a particular scale in the Test Builder node tree and activate the context menu command “Create interpretation”.
- Select the node of a particular scale in the Test Builder node tree and click the toolbar button
.
The edit-interpretation operation does not create a new interpretation in the current project; it only allows the properties of an existing interpretation to be changed. To start the edit-interpretation operation, likewise use one of the following methods:
- Select the node of the interpretation to be edited in the Test Builder node tree and activate the main menu command “Object → Edit interpretation”.
- Select the node of the interpretation to be edited in the Test Builder node tree and use the keyboard shortcut SHIFT-Enter.
- Select the node of the interpretation to be edited in the Test Builder node tree and activate the context menu command “Edit interpretation”.
- Select the node of the interpretation to be edited in the Test Builder node tree and click the toolbar button
.
The following properties are defined for every interpretation: “Name” and “Description”. The name is a required field and cannot be empty. It cannot exceed 255 characters and must occupy only one line. Unlike the name, the description is practically unlimited in length. The description can also consist of any number of paragraphs.
The name is always displayed in the Test Builder tree as the interpretation node. The description is displayed in the test results if information has been entered in the corresponding field. Thus, extended information can be used to identify the interpretation. Otherwise, the interpretation name is used in the test results.
When the create-interpretation operation is started, the program automatically fills in the “Name” field. However, the value of this field can be changed at any time.
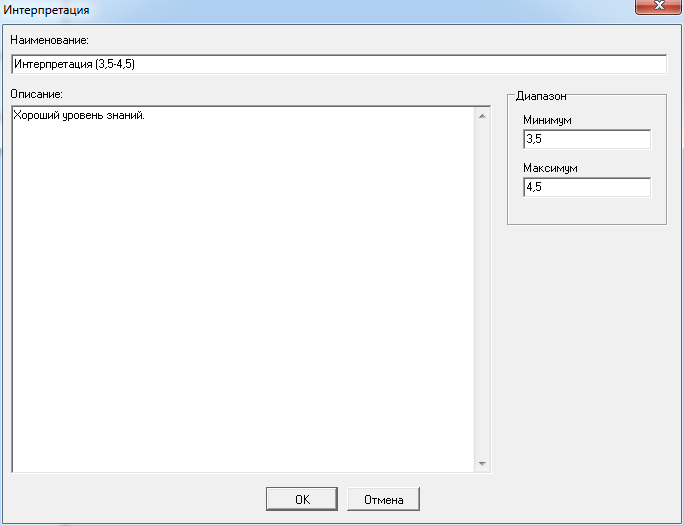
Specify the interpretation properties in this window:
- In the “Name” field, enter a valid interpretation name that will be displayed in the Test Builder node tree
- In the “Description” field, enter any useful information related to this interpretation.
To confirm the invoked operation, click OK. When creating an interpretation, a new interpretation is created; when editing, the new properties are saved for the selected interpretation.
To cancel the invoked operation, click “Cancel”. In both cases (creating and editing an interpretation), this only closes the “Interpretation” window and no test objects are created or modified.
An interpretation cannot be edited in a test imported into the project from a file to which the test had previously been exported as private.
6.5.2.Deleting an Interpretation
To start the delete-interpretation operation, use one of the following methods:
- Select the node of the interpretation to be deleted in the Test Builder node tree and activate the main menu command “Object → Delete interpretation”.
- Select the node of the interpretation to be deleted in the Test Builder node tree and use the keyboard shortcut SHIFT-Del.
- Select the node of the interpretation to be deleted in the Test Builder node tree and activate the context menu command “Delete interpretation”.
- Select the node of the interpretation to be deleted in the Test Builder node tree and click the toolbar button
.
To permanently delete the selected interpretation from the project, additional confirmation is required when prompted by Sindy.
6.6.Creating, Editing, and Deleting a Question
A question is a test object used to obtain a response from the test-taking respondent. During testing, each question is displayed in a separate window.
A question can be created, edited, or deleted only in a created or open project.
6.6.1.Creating and Editing a Question
The create-question operation not only creates a new question in the current project but also allows its properties to be defined. To start the create-question operation, use one of the following methods:
- Select the “Questions and Answers” node of a particular test in the Test Builder node tree and activate the main menu command “Object → Create test group”.
- Select the “Questions and Answers” node of a particular test in the Test Builder node tree and use the keyboard shortcut SHIFT-Ins.
- Select the “Questions and Answers” node of a particular test in the Test Builder node tree and activate the context menu command “Create test group”.
- Select the “Questions and Answers” node of a particular test in the Test Builder node tree and click the toolbar button
.
The edit-question operation does not create a new question in the current project; it only allows the properties of an existing question to be changed. To start the edit-question operation, likewise use one of the following methods:
- Select the node of the question to be edited in the Test Builder node tree and activate the main menu command “Object → Edit question”.
- Select the node of the question to be edited in the Test Builder node tree and use the keyboard shortcut SHIFT-Enter.
- Select the node of the question to be edited in the Test Builder node tree and activate the context menu command “Edit question”.
- Select the node of the question to be edited in the Test Builder node tree and click the toolbar button
.
The following properties are defined for every question: “Name” and “Description”. The name is a required field and cannot be empty. It cannot exceed 255 characters and must occupy only one line. Unlike the name, the description is practically unlimited in length. The description can also consist of any number of paragraphs.
The name is always displayed in the Test Builder tree as the question node. The description is displayed as the question during testing and in the test results if information has been entered in the corresponding field. Thus, extended information can be used to identify the question. Otherwise, the question name is used during testing and in its results.
When the create-question operation is started, the program automatically fills in the “Name” field. However, the value of this field can be changed at any time.
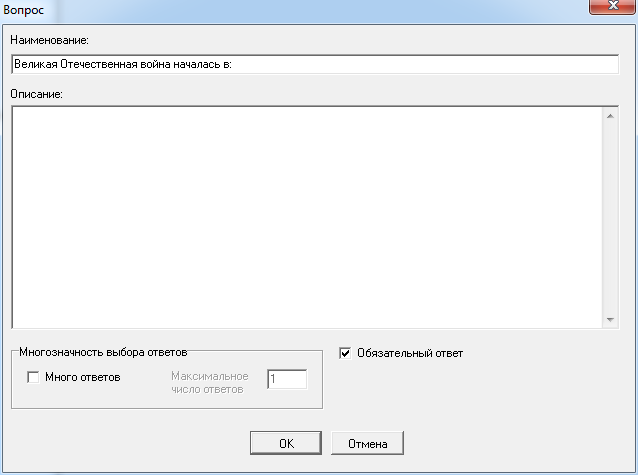
Specify the question properties in this window:
- In the “Name” field, enter a valid question name that will be displayed in the Test Builder node tree and used during testing if the “Description” field is empty.
- In the “Description” field, enter any useful information related to this question.
- For the “Multiple answer selection” property group, if required (use the Tab key to move between the elements of the group):
- Activate the “Multiple answers” checkbox if the user may select more than one answer to this question during testing
- In the “Maximum number of answers” field, specify the maximum number of answers that the user may select for this question during testing (this field is available when “Multiple answers” is active)
- Activate the “Required answer” checkbox if the user must select at least one answer to this question during testing
To confirm the invoked operation, click OK. When creating a question, a new question is created; when editing, the new properties are saved for the selected question.
To cancel the invoked operation, click “Cancel”. In both cases (creating and editing a question), this only closes the “Question” window and no test objects are created or modified.
A question cannot be edited in a test imported into the project from a file to which the test had previously been exported as private.
6.6.2.Deleting a Question
The delete-question operation deletes the question itself and recursively deletes all answers contained in this group together with all weights belonging to those answers. To start the delete-question operation, use one of the following methods:
- Select the node of the question to be deleted in the Test Builder node tree and activate the main menu command “Object → Delete question”.
- Select the node of the question to be deleted in the Test Builder node tree and use the keyboard shortcut SHIFT-Del.
- Select the node of the question to be deleted in the Test Builder node tree and activate the context menu command “Delete question”.
- Select the node of the question to be deleted in the Test Builder node tree and click the toolbar button
.
To permanently delete the selected question from the project, additional confirmation is required when prompted by Sindy.
6.7.Creating, Editing, and Deleting an Answer
An answer defines the response that a test-taking respondent can select from the list offered for the current question presented during testing.
An answer can be created, edited, or deleted only in a created or open project.
6.7.1.Creating and Editing an Answer
The create-answer operation not only creates a new answer in the current project but also allows its properties to be defined. To start the create-answer operation, use one of the following methods:
- Select the node of a particular question in the Test Builder node tree and activate the main menu command “Object → Create answer”.
- Select the node of a particular question in the Test Builder node tree and use the keyboard shortcut SHIFT-Ins.
- Select the node of a particular question in the Test Builder node tree and activate the context menu command “Create answer”.
- Select the node of a particular question in the Test Builder node tree and click the toolbar button
.
The edit-answer operation does not create a new answer in the current project; it only allows the properties of an existing answer to be changed. To start the edit-answer operation, likewise use one of the following methods:
- Select the node of the answer to be edited in the Test Builder node tree and activate the main menu command “Object → Edit answer”.
- Select the node of the answer to be edited in the Test Builder node tree and use the keyboard shortcut SHIFT-Enter.
- Select the node of the answer to be edited in the Test Builder node tree and activate the context menu command “Edit answer”.
- Select the node of the answer to be edited in the Test Builder node tree and click the toolbar button
.
The following properties are defined for every answer: “Name” and “Description”. The name is a required field and cannot be empty. It cannot exceed 255 characters and must occupy only one line. Unlike the name, the description is practically unlimited in length. The description can also consist of any number of paragraphs.
The name is always displayed in the Test Builder tree as the answer node. The description is displayed as the answer during testing and in the test results if information has been entered in the corresponding field. Thus, extended information can be used to identify the answer. Otherwise, the answer name is used during testing and in its results.
When the create-answer operation is started, the program automatically fills in the “Name” field. However, the value of this field can be changed at any time.
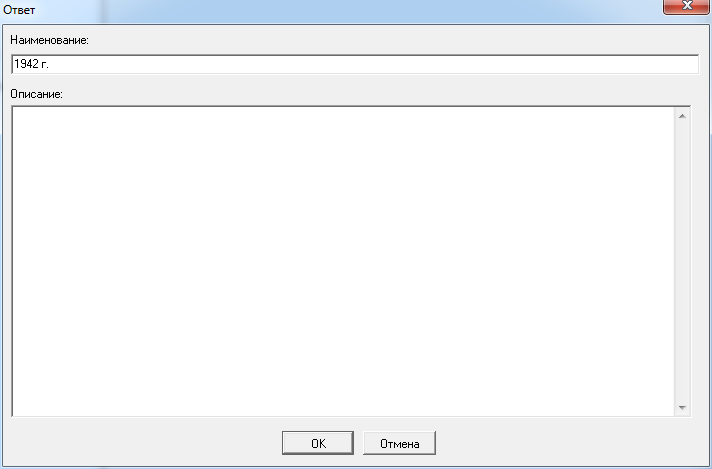
Specify the answer properties in this window:
- In the “Name” field, enter a valid answer name that will be displayed in the Test Builder node tree and used during testing if the “Description” field is empty.
- In the “Description” field, enter any useful information related to this answer.
To confirm the invoked operation, click OK. When creating an answer, a new answer is created; when editing, the new properties are saved for the selected answer.
To cancel the invoked operation, click “Cancel”. In both cases (creating and editing an answer), this only closes the “Answer” window and no test objects are created or modified.
An answer cannot be edited in a test imported into the project from a file to which the test had previously been exported as private.
6.7.2.Deleting an Answer
The delete-answer operation deletes the answer itself and recursively deletes all weights associated with it. To start the delete-answer operation, use one of the following methods:
- Select the node of the answer to be deleted in the Test Builder node tree and activate the main menu command “Object → Delete answer”.
- Select the node of the answer to be deleted in the Test Builder node tree and use the keyboard shortcut SHIFT-Del.
- Select the node of the answer to be deleted in the Test Builder node tree and activate the context menu command “Delete answer”.
- Select the node of the answer to be deleted in the Test Builder node tree and click the toolbar button
.
To permanently delete the selected answer from the project, additional confirmation is required when prompted by Sindy.
6.8.Creating, Editing, and Deleting a Weight
A weight is a numeric characteristic that determines the effect of a particular answer on a selected scale when the test taker chooses that answer during testing.
A weight can be created, edited, or deleted only in a created or open project.
6.8.1.Creating and Editing a Weight
The create-weight operation not only creates a new weight in the current project but also allows its properties to be defined. To start the create-weight operation, use one of the following methods:
- Select the node of a particular answer in the Test Builder node tree and activate the main menu command “Object → Create weight”.
- Select the node of a particular answer in the Test Builder node tree and use the keyboard shortcut SHIFT-Ins.
- Select the node of a particular answer in the Test Builder node tree and activate the context menu command “Create weight”.
- Select the node of a particular answer in the Test Builder node tree and click the toolbar button
.
The edit-weight operation does not create a new weight in the current project; it only allows the properties of an existing weight to be changed. To start the edit-weight operation, likewise use one of the following methods:
- Select the node of the weight to be edited in the Test Builder node tree and activate the main menu command “Object → Edit weight”.
- Select the node of the weight to be edited in the Test Builder node tree and use the keyboard shortcut SHIFT-Enter.
- Select the node of the weight to be edited in the Test Builder node tree and activate the context menu command “Edit weight”.
- Select the node of the weight to be edited in the Test Builder node tree and click the toolbar button
.
The following properties are defined for every weight: “Name” and “Description”. The name is a required field and cannot be empty. It cannot exceed 255 characters and must occupy only one line. Unlike the name, the description is practically unlimited in length. The description can also consist of any number of paragraphs.
The name is always displayed in the Test Builder tree as the weight node. The description is used by the user only for reference purposes to store additional information about the weight.
When the create-question operation is started, the program automatically fills in the “Name” field. However, the value of this field can be changed at any time.
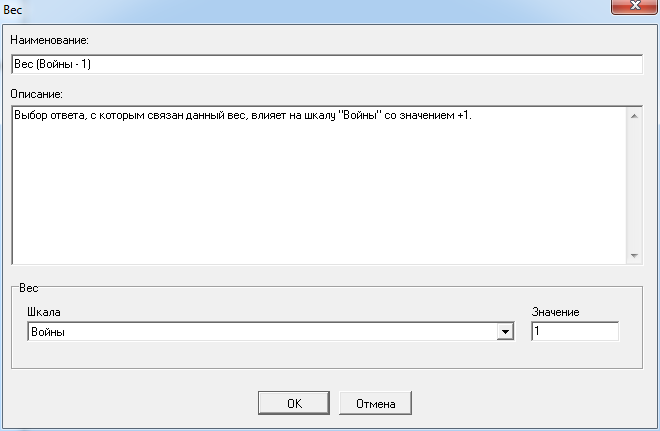
Specify the weight properties in this window:
- In the “Name” field, enter a valid weight name that will be displayed in the Test Builder node tree.
- In the “Description” field, enter any useful information related to this weight.
- For the “Weight” property group (use the Tab key to move between the elements of the group):
- Select the name of the associated scale from the “Scale” drop-down list if there are still unused scales for this answer.
- In the “Value” field, specify the numeric value by which this answer affects the result on the specified scale during testing.
To confirm the invoked operation, click OK. When creating a weight, a new weight is created; when editing, the new properties are saved for the selected weight.
To cancel the invoked operation, click “Cancel”. In both cases (creating and editing a weight), this only closes the “Weight” window and no test objects are created or modified.
A weight cannot be edited in a test imported into the project from a file to which the test had previously been exported as private.
6.8.2.Deleting a Weight
To start the delete-weight operation, use one of the following methods:
- Select the node of the weight to be deleted in the Test Builder node tree and activate the main menu command “Object → Delete weight”.
- Select the node of the weight to be deleted in the Test Builder node tree and use the keyboard shortcut SHIFT-Del.
- Select the node of the weight to be deleted in the Test Builder node tree and activate the context menu command “Delete weight”.
- Select the node of the weight to be deleted in the Test Builder node tree and click the toolbar button
.
To permanently delete the selected weight from the project, additional confirmation is required when prompted by Sindy.
6.9.Changing the Order of Objects
The order of test objects can be changed by the user directly in the node tree. For test groups, tests, scales, interpretations, and weights, this may be relevant only for how clearly they are presented in the Test Builder, whereas changing the order of questions and answers changes the sequence in which they are displayed during testing.
The order of objects can be changed only in a created or open project.
There are two ways to change the order of objects: using the Drag & Drop method and using the special “Arrange Objects” window. The first option is recommended when you need to change the order of individual test objects as quickly and conveniently as possible; the second is recommended when moving more than one object at a time.
To change the order of objects using the “Arrange Objects” window, first select a node in the node tree. In particular, to change the order of:
- test groups, select the “Tests” node;
- tests in a particular group, select that test-group node;
- scales of a particular test, select the “Scales and Interpretations” node of that test;
- interpretations of a particular scale, select that scale node;
- questions of a particular test, select the “Questions and Answers” node of that test
- answers to a particular question, select that question node;
- weights of a particular answer, select that answer node.
Then use one of the following methods:
- Activate the main menu command “Object → Arrange <test objects>…”, where <test objects> is replaced by the type of objects being arranged.
- Activate the context menu command “Arrange <test objects>…”, where <test objects> is replaced by the type of objects being arranged.
- Select the object in the Test Builder node tree whose child objects need to be arranged and click the toolbar button
.
Starting the arrangement operation opens the “Arrange Objects” window, which makes it possible to directly change the order of test objects. This window is particularly useful when a large number of objects need to be reordered.
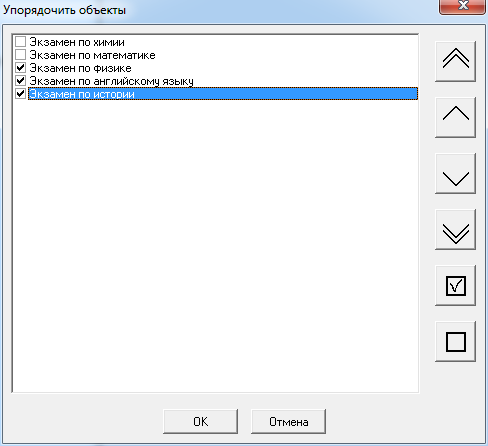
This window contains a list of objects that can be moved relative to one another. To indicate the particular objects that should be moved at the current time, select them by clicking the left mouse button while the pointer is over the square in front of the object name. Selected objects are marked with a check mark.
The buttons on the right move the objects selected in the list. These buttons include:
| Button icon | Button name | Description |
 |
Move All Selected Objects to Beginning | Move all selected objects to the beginning of the list while preserving their current order relative to one another. |
 |
Move All Selected Objects One Position Up | Move each selected object one position up while preserving the current order of the selected objects relative to one another. |
 |
Move All Selected Objects One Position Down | Move each selected object one position down while preserving the current order of the selected objects relative to one another. |
 |
Move All Selected Objects to End | Move all selected objects to the end of the list while preserving their current order relative to one another. |
 |
Select All Objects | Select all objects displayed in the arrangement window at once. |
 |
Deselect All Object | Deselect all objects displayed in the arrangement window at once. |
Instead of the buttons shown above, the corresponding commands in this window’s context menu can be used.
To save the changes made to the order of objects in the project, click OK; to return to the previous order and cancel all changes made in this window, click “Cancel”.
6.10.Deleting a Group of Objects
Sindy makes it possible to delete an entire group of test objects. Group deletion of test objects must be performed with extreme caution because this procedure cannot be undone after the operation is confirmed. It is strongly recommended to create a copy of the project file beforehand in case the deleted data should not in fact have been lost.
A group of objects can be deleted only in a created or open project.
To start the delete-group-of-objects operation, first select the parent node of these objects in the node tree. To delete:
- all test groups, select the “Tests” node;
- all tests in a particular group, select that test-group node;
- all scales of a particular test, select the “Scales and Interpretations” node of that test;
- all interpretations of a particular scale, select that scale node;
- all questions of a particular test, select the “Questions and Answers” node of that test;
- all answers to a particular question, select that question node;
- all weights of a particular answer, select that answer node.
Then use one of the following methods:
- Activate the main menu command “Object → Delete all <test objects>…”, where <test objects> is replaced by the type of objects being deleted.
- Activate the context menu command “Delete all <test objects>…”, where <test objects> is replaced by the type of objects being deleted.
- Select the node of the weight to be deleted in the Test Builder node tree and click the toolbar button
.
Starting the operation for deleting a group of test objects opens the “Confirm deleting child objects” confirmation dialog, which can be used either to confirm that the operation should be performed or to cancel it.
6.11.Searching for Objects
The node tree can contain a large number of test objects. To quickly find the required objects in the node tree, Sindy provides object-search functionality.
Objects can be searched for only in a created or open project.
To search for objects, first define the search criterion, i.e. specify in the program exactly what needs to be found. One of the nodes in the Test Builder tree must then be selected to define the starting point for the search. Next, start the object-search procedure using one of the following methods:
- Use the main menu command “Edit → Find…”.
- Use the keyboard shortcut “CTRL-F”.
- Use the toolbar button
.
Starting the search opens the “Find First” window. This window is used to define new search criteria in an open or created project and find the required objects using those criteria.
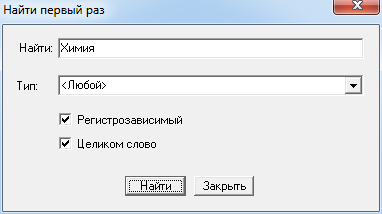
The search is performed across all nodes in the Test Builder tree, even if they do not correspond to particular test objects. As stated earlier, the search starts from the selected node and proceeds downward (toward the very last object in the node tree). Both hidden and expanded nodes are searched.
In the “Find” field, you can specify a word or only part of a word that must occur in the search result. The “Type” drop-down list can be used to search only objects of a predefined type (test groups, tests, scales, interpretations, questions, answers, or weights). If the “Case-sensitive” option is enabled, the search takes into account the case of the characters entered in the “Find” field. If the “Whole word” option is enabled, the search continues until a node containing the complete word specified in the “Find” field is found.
To start searching with the specified criteria, click “Find”; to cancel the search, click “Close”.
To change the search criteria, perform the procedure described above. You can also reuse the search criterion set previously. To do so, again select the starting node in the Test Builder node tree and then search using one of the following methods:
- Use the main menu command “Edit → Find Next”.
- Use the keyboard shortcut F3.
- Use the toolbar button
.
In both cases, the search result is a selected node in the node tree. If no nodes matching the specified criterion are found, the following message is displayed.
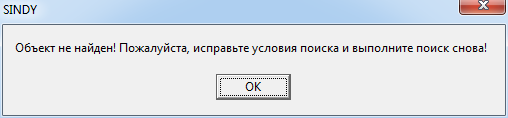
6.12.Importing and Exporting Data
6.12.1.Importing a Test
Test import makes it possible to add new tests to the current project. For example, some tests may have been developed by commercial companies, others may be original methods obtained from their authors, and still others may have been created independently using Sindy.
Tests can be imported only into a created or open project.
The test-import procedure can be started using one of the following methods:
Starting the procedure opens the “Import Test” window.
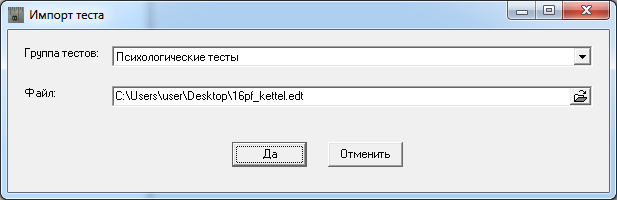
In this window:
- select the test group into which the test should be imported using the “Test group” list;
- enter the name of the file containing the test to be imported in the “File” field.
Click “Yes” to confirm importing data from the selected file or “Cancel” to cancel the operation and close the current dialog.
For convenient file selection, use the additional “Import Test” dialog by clicking the button 
.
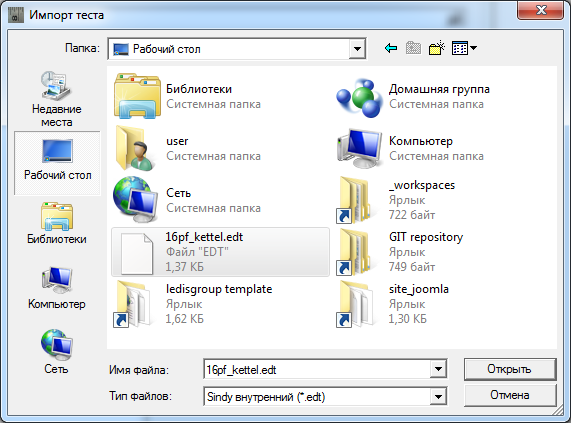
This window makes it possible to select a file containing a test in EDT format in order to import these tests into the user’s project.
To select the test-import file, specify its name in the “File name” field. You can enter the full path to the file or use the “Folder” drop-down list and the “Recent Places”, “Desktop”, “Libraries”, “Computer”, or “Network” buttons to locate the file. The “Files of type” drop-down list can be used to enable or disable file filtering by the standard file extension for Sindy projects.
Click “Open” to confirm selection of the file or “Cancel” to cancel the operation and close the current dialog.
The imported test is added to the selected test group.
Importing large tests into a project that already contains many tests can take quite a long time. In this case, be patient and wait for the procedure to finish.
Remember that if you import a test that was marked as private when it was exported, you will not be able to edit it or export it again. In this case, you can only take the test.
6.12.2.Exporting a Test
The test-export procedure makes it possible to save all information about a test to a file that can be transferred to another project, provided to another specialist for further work, or used to launch testing on the Internet.
A test can be exported only from a created or open project.
The test-import procedure can be started using one of the following methods:

Starting the procedure opens the “Export Test” window.
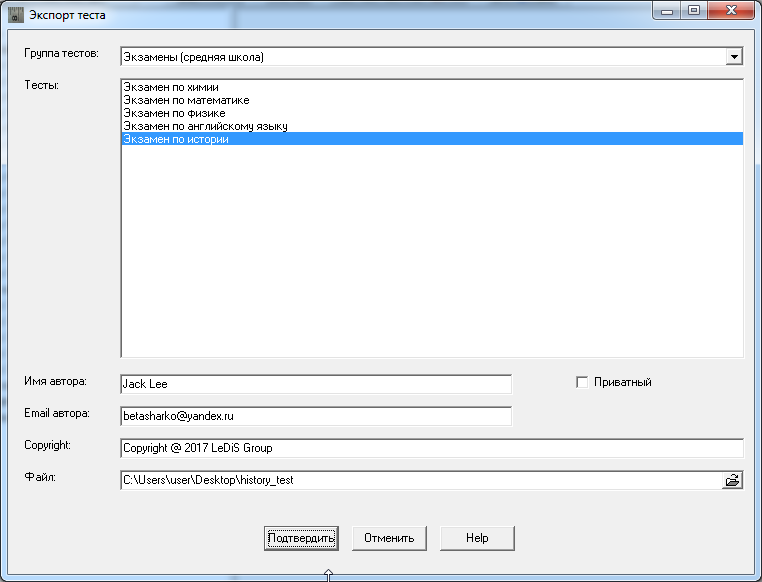
In this window:
- select the test group from which the test should be exported using the “Test group” list;
- select the test to export in the “Tests” list;
- activate the “Private” option if you want to prohibit anyone from editing the test after it is subsequently imported (use this option when developing original tests protected against copying);
- specify the test author’s name in the “Author name” field or use the default data for the selected test;
- specify the test author’s email in the “Author Email” field or use the default data for the selected test;
- specify the test author’s rights in the “Copyright” field or use the default data for the selected test;
- enter the name of the file containing the imported test in the “File” field.
Click “Confirm” to confirm exporting the data to the selected file or “Cancel” to cancel the operation and close the current dialog.
For convenient file selection, use the additional “Import Test” dialog by clicking the button
.
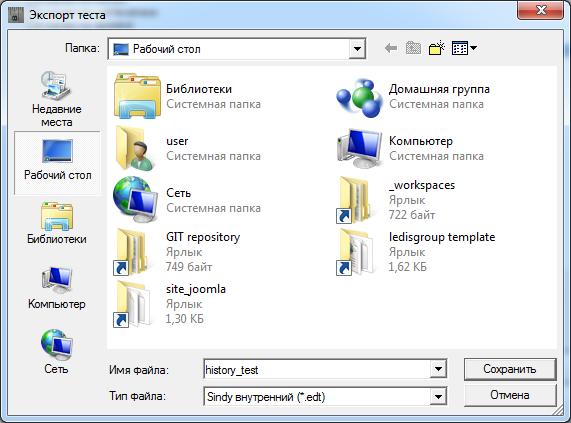
This window makes it possible to select the file in which information about the exported test will be saved. The following file types are available for saving a test:
EDT — a binary format from which the test can subsequently be imported into any Sindy project;
XML — a text format based on eXtensible Markup Language from which the test can be imported into any third-party program that supports this standard;
CSV — a text format from which the test can subsequently be imported into spreadsheet applications such as Microsoft Excel, OpenOffice Calc, etc.;
SWB — a binary format from which the test can subsequently be imported into the LeDiS Group website for online testing.
To select the test-import file, specify its name in the “File name” field. You can enter the full path to the file or use the “Folder” drop-down list and the “Recent Places”, “Desktop”, “Libraries”, “Computer”, or “Network” buttons to locate the file. The “Files of type” drop-down list can be used to enable or disable file filtering by file extension for Sindy projects.
Click “Save” to confirm selection of the file or “Cancel” to cancel the operation and close the current dialog.
6.12.3.Importing Scales and Interpretations from a Text File
When constructing a test, entering scales and their interpretations in the usual way can take too much time. For this purpose, Sindy includes a mechanism that allows a test to be populated with scales and interpretations more quickly.
First, prepare a text file in which each scale and interpretation appears on a separate line of text. The first line in each group is always a scale, and all following lines up to the nearest blank line are considered its interpretations. A group consisting of a scale and its interpretations can be separated from the next group by any number of blank lines, but at least one blank line must be present.
The classic Windows Notepad application can be used to prepare the file.
Now let us create an example containing a set of scales and interpretations in a text file and import them into a new Sindy project:
- Prepare a text file in “Notepad” with the following contents:
Scale 1
Scale 2
Scale 3
Interpretation 31
Scale 4
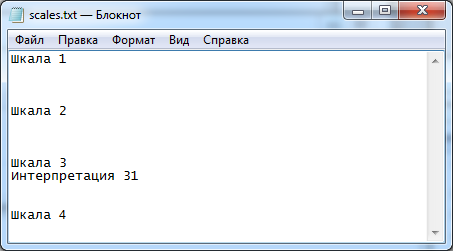
- Save the data to the “scales.txt” file. Select ANSI encoding.
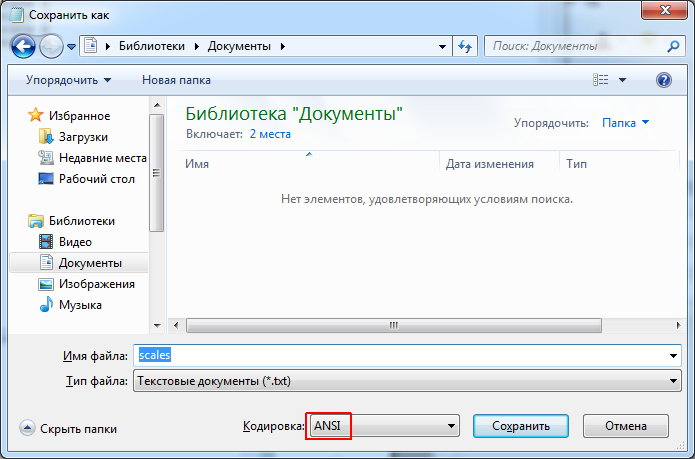
- Close this file and start Sindy. Create a new project, and within it create a new test group and test. Use the default names for the test group and test.
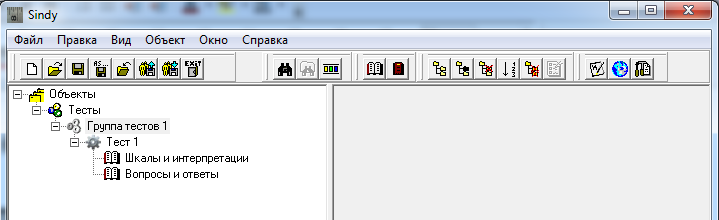
- On the “Scales and Interpretations” node, select the “Import scales...” context menu command.
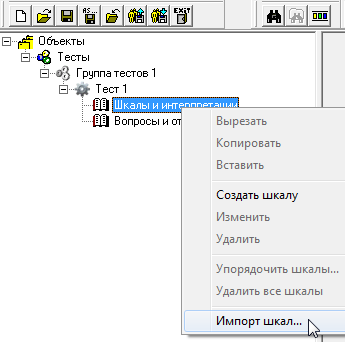
- In the “Import Scales and Interpretations” window, locate and select the file containing the list of scales created earlier. Click “Open” to confirm the file selection.
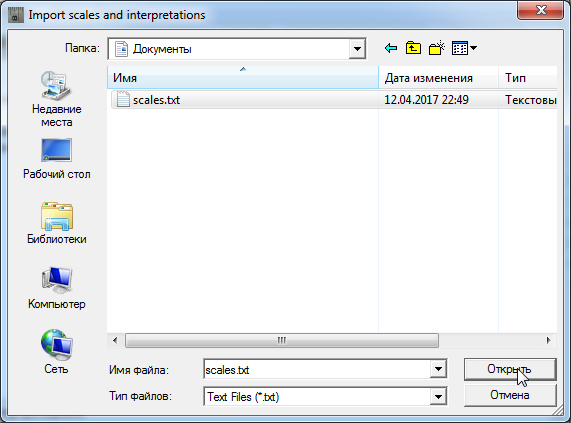
- In the Test Builder, expand the “Scales and Interpretations” node and verify that the list of scales and interpretations from the file we prepared has appeared.
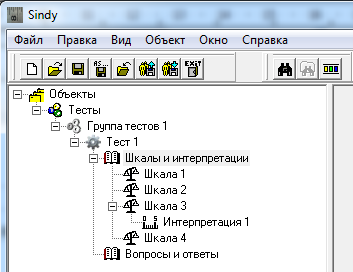
6.12.4.Importing Questions and Answers from a Text File
When constructing a test, entering questions and their answers in the usual way can take too much time. For this purpose, Sindy includes a mechanism that allows a test to be populated with questions and answers more quickly.
First, prepare a text file in which each question and answer appears on a separate line of text. The first line in each group is always a question, and all following lines up to the nearest blank line are considered its answers. A group consisting of a question and its answers can be separated from the next group by any number of blank lines, but at least one blank line must be present.
The classic Windows Notepad application can be used to prepare the file.
Now let us create an example containing a set of questions and answers in a text file and import them into a new Sindy project:
- Prepare a text file in “Notepad” with the following contents:
Question 1
Question 2
Question 3
Answer 31
Question 4
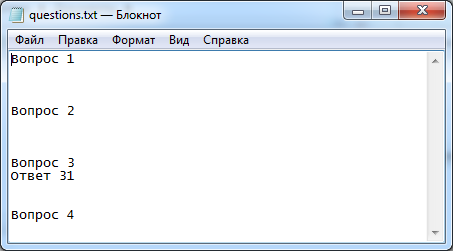
- Save the data to the “questions.txt” file. Select ANSI encoding.
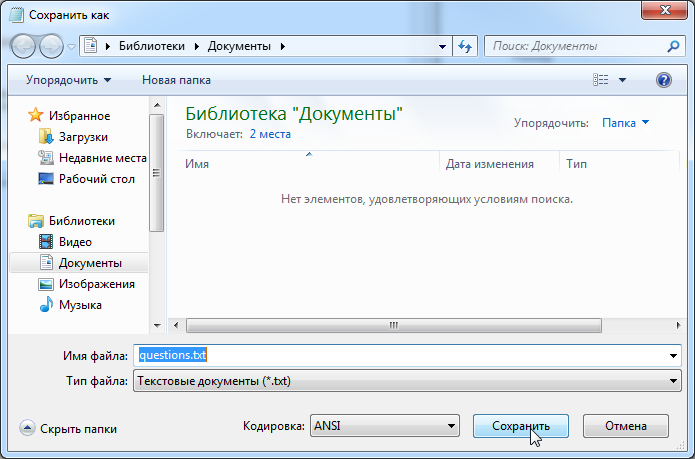
- Close this file and start Sindy. Create a new project, and within it create a new test group and test. Use the default names for the test group and test.
- On the “Questions and Answers” node, select the “Import questions...” context menu command.
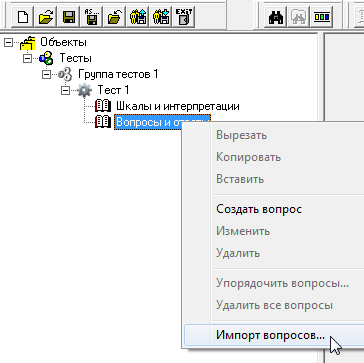
- In the “Import Questions and Answers” window, locate and select the file containing the list of questions created earlier. Click “Open” to confirm the file selection.
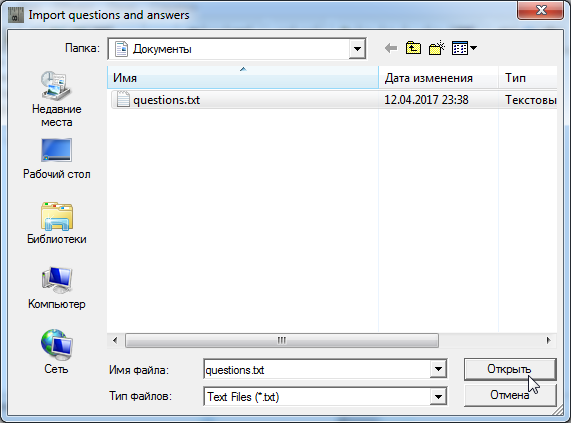
- In the Test Builder, expand the “Questions and Answers” node and verify that the list of questions and answers from the file we prepared has appeared.
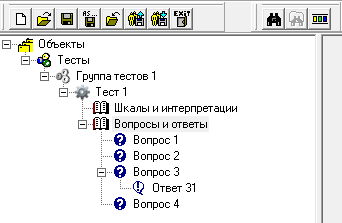
7.Test Player
7.1.General Information
The Test Player makes it possible to run tests in a created or open project.
To launch a test, use one of the following methods:
- Select the test node or any of its child nodes in the Test Builder node tree and activate the main menu command “Object → Run test”.
- Select the test node or any of its child nodes in the Test Builder node tree and use the keyboard shortcut CTRL-R.
- Select the test node in the Test Builder node tree and activate the context menu command “Run test”.
- Select the test node or any of its child nodes in the Test Builder node tree and click the toolbar button
.
Launching a test opens a child window with the title “Test (<Test name>)”. Running a test consists of displaying a sequence of screens to the user containing questions and their available answers. The user moves between screens, subject to the conditions defined for the current test and screen.
Although any number of running-test windows can be open, the same test cannot be launched more than once. If an attempt is made to launch a test that is already running, the program displays a warning similar to the following:
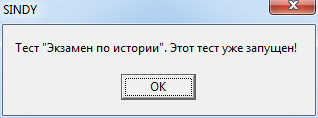
A test window can be closed by the user at any time. To do this, either left-click the icon 
or use the “Close” command in the context menu of the Test Player child window.
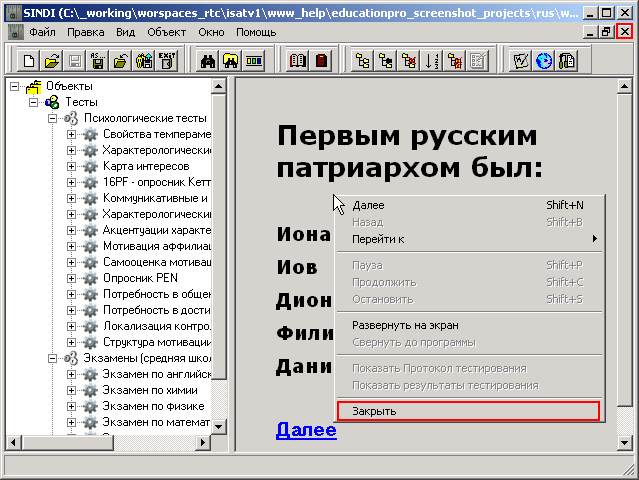
Attempting to close a child window opens a special dialog for final confirmation that the test window should be closed.

Clicking “Yes” closes the test window, while “No” leaves the window in its current state.
When exiting Sindy while tests are running, a similar confirmation dialog is displayed for each running test. Canceling the closing of even one test completely interrupts the program-exit procedure, leaving any tests that have not yet been closed running.
It should be noted that Test Player child windows have additional icons for controlling the state of the child window. To the left of the child-window close icon
is the icon  , which expands the window to fill the entire Test Player panel. Farther to the left is the icon
  , which minimizes the child window to its smallest size.
When a test is launched, the following types of information screens are displayed in Test Player child windows:
7.2.Arranging Child Windows
When several tests are running in the program at the same time, it becomes quite convenient to manage the child windows using the “Window” group of the main menu. Use the “Window → Cascade” main-menu command to arrange child windows in a cascade.
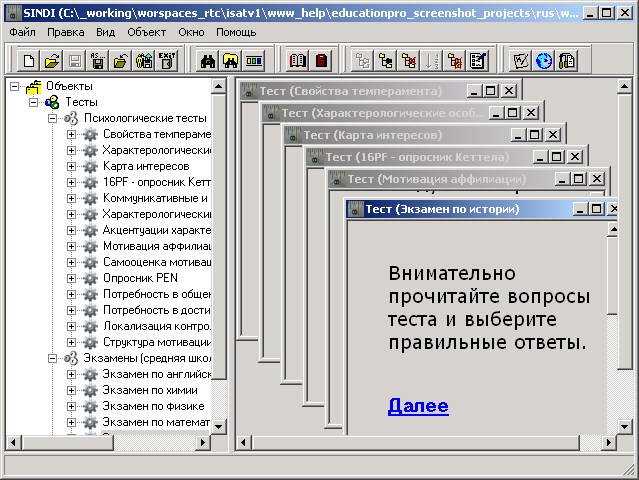
Use the “Window → Tile” main-menu command to arrange child windows so that they fill the entire Test Player panel.
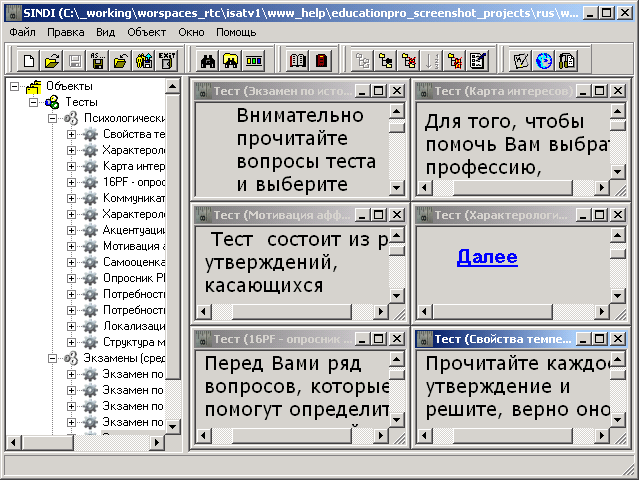
7.3.Changing the Size of a Child Window
The Test Player makes it possible to expand the child window of a running test to the full screen. This program feature makes it possible to eliminate the influence of unrelated software elements on the testing process.
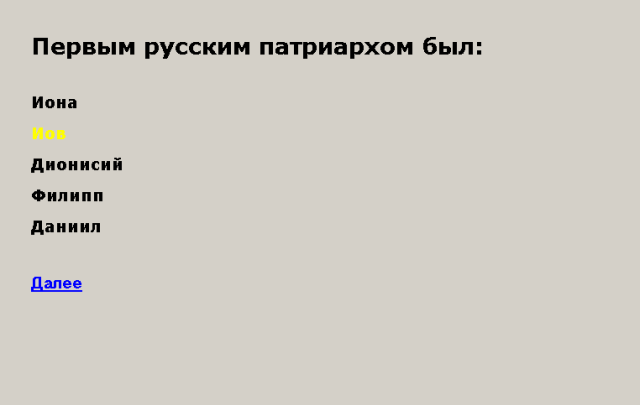
No more than one child window of a running test can be displayed full screen at any one time. To expand another test window to full screen, first restore the window that was previously expanded.
To switch to full-screen test-running mode, use the child window’s context menu command “Expand to Full Screen”. To return to embedded child-window mode, use the child window’s context menu command “Restore to Program”.
7.4.Test Instructions
The first screen displayed when a test is run is the instruction screen prepared when the test was constructed.
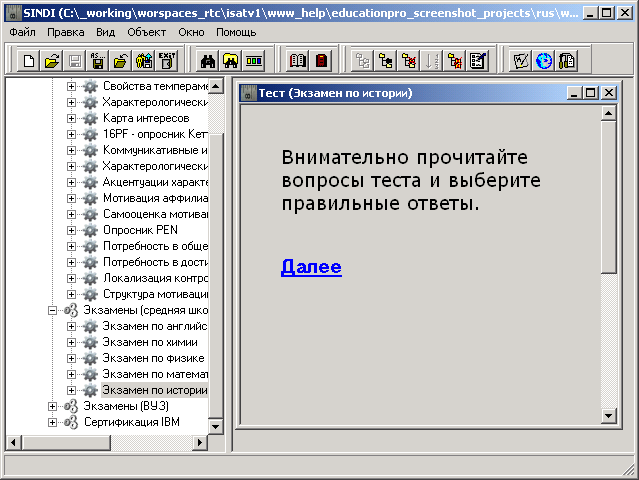
The instructions provide the user with all necessary information about exactly what must be done while taking this test. The user should read these instructions carefully. The information in them is used when answering the test questions presented on the following screens.
To go to the first test question, use one of the following methods:
- Left-click the link

located directly below the instruction text - Use the keyboard shortcut SHIFT-N.
- Use the “Next” command in the test window’s context menu.
7.5.Question-and-Answer Screens
Question-and-answer screens are used to perform the testing procedure itself. Each such screen displays one question and the available answer options for that question. During testing, the user selects the most appropriate answers for each question.
7.5.1.Selecting Answers
Answers can be selected using either the mouse or the keyboard.
To select an answer with the mouse, move the pointer to the selected answer and click the left mouse button. To select an answer using the keyboard, you can use the keyboard shortcuts defined for the Test Player.
An answer selected by either method (mouse or keyboard) changes color.
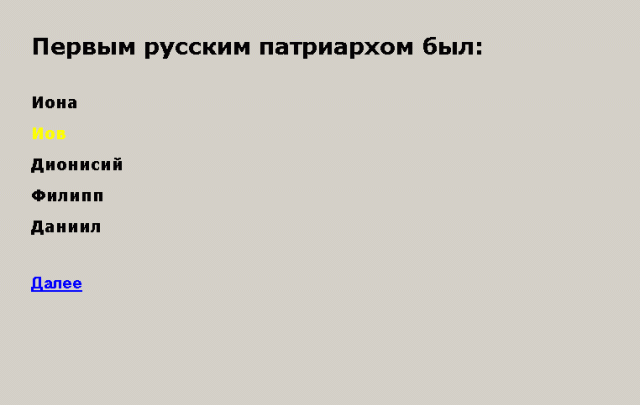
To deselect an answer, perform the same action on the already selected answer.
Sindy provides various answer-selection modes depending on the settings defined when the current test and current question were constructed.
If the “Multiple answers” option in the “Multiple answer selection” group is enabled for the current question, newly selected answers are activated in addition to answers that have already been selected.
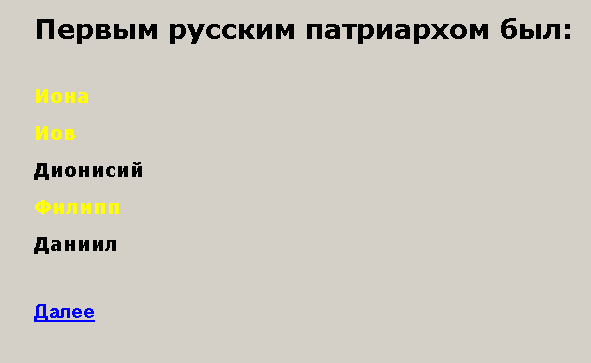
However, if the “Maximum number of answers” field in the “Multiple answer selection” group for the current question contains a value equal to the number of answers already selected, each subsequent attempt to select an answer causes a message similar to the following to appear:

Thus, the program prevents the user from selecting more answers than specified in the “Maximum number of answers” field.
It should be noted that if the “Multiple answers” option in the “Multiple answer selection” group is disabled for the current question, selecting each new answer automatically deactivates the answer previously selected for the current question.
If the “Required answer” option in the “Multiple answer selection” group is enabled for the current question, and the current test has the “Forward only” or “Forward and backward” option selected in the “Test navigation” group, the user must select at least one answer to the current question before moving to the next test screen. Otherwise, a message similar to the following is displayed:
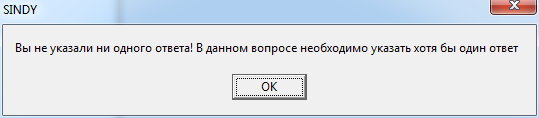
A similar message is displayed if the “Required answer” option in the “Multiple answer selection” group is enabled, while the test has the “Any question” option selected in the “Test navigation” group and the “Question repeats” option is disabled.
With the same settings but with the “Question repeats” option enabled, no such warning is displayed. In this case, however, if at least one answer was not selected for some test questions, the final test screen contains a list of links to those skipped questions with a suggestion to return to them and provide answers.
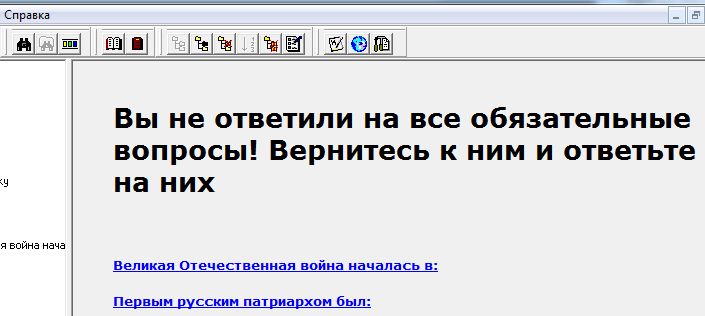
In this case, test reports are not available until you answer all test questions.
To answer skipped questions, click the question link and use the “Go To → <question name>” context menu command to locate the remaining skipped questions.
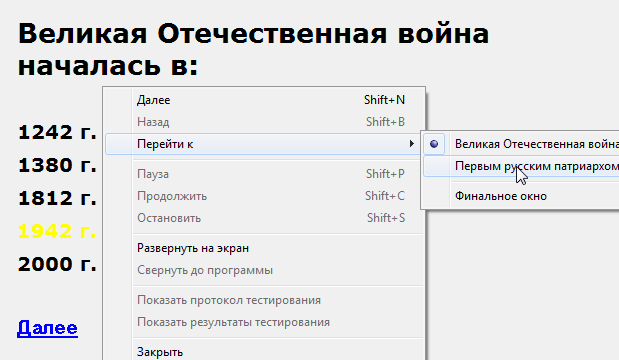
7.5.2.Moving to a New Question
The system controls navigation through test questions according to the “Test navigation” group settings defined when the test itself was constructed.
When the “Forward only” option in the “Test navigation” group is selected, all test questions are displayed sequentially from first to last according to their defined order. In this case, use one of the following methods to move through the test questions:
- Left-click the link
located directly below the instructions - Use the keyboard shortcut SHIFT-N.
- Use the “Next” command in the test child window’s context menu.
After the last question in the test is displayed, the next screen is the final test screen.
When the “Forward and backward” option in the “Test navigation” group is selected, all test questions are displayed sequentially from first to last according to their current order, but navigation is possible in both directions (forward and backward). In this case, use one of the following methods to move through test questions:
- To go to the next test question:
- Left-click the link
located directly below the instructions. - Use the keyboard shortcut SHIFT-N.
- Use the “Next” command in the test child window’s context menu.
- Left-click the link
- To go to the next test question:
- Left-click the link

located directly below the instructions. - Use the keyboard shortcut SHIFT-B.
- Use the “Back” command in the test child window’s context menu.
- Left-click the link
After the last question in the test is displayed, the next screen is the final test screen. In addition, only forward movement is allowed from the screen containing the first question.
When the “Any question” option in the “Test navigation” group is selected, it becomes possible to move freely to any test question. In this case, use one of the following methods to move through test questions:
- To go to the next test question:
- Left-click the link
located directly below the instructions. - Use the keyboard shortcut SHIFT-N.
- Use the “Next” command in the test child window’s context menu.
- Left-click the link
If the “Question repeats” option is also enabled (i.e. repeated questions are allowed), navigation proceeds to the next question immediately following the current one. If the “Question repeats” option is disabled (i.e. repeated questions are prohibited), the next question is the nearest question after the current one that has not yet been displayed during the current testing session.
- To go to the previous test question:
- Left-click the link
located directly below the instructions. - Use the keyboard shortcut SHIFT-B.
- Use the “Back” command in the test child window’s context menu.
- Left-click the link
If the “Question repeats” option is also enabled (i.e. repeated questions are allowed), navigation proceeds to the previous question immediately preceding the current one. If the “Question repeats” option is disabled (i.e. repeated questions are prohibited), the previous question is the nearest question before the current one that has not yet been displayed during the current testing session.
After the last question in the test is displayed, the next screen is the final test screen. In addition, only forward movement is allowed from the screen containing the first question.
- To go directly to any test question, use the context menu command “Go To → <question name>”
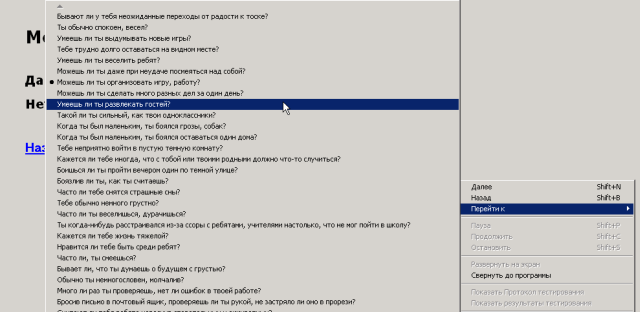
The context-menu item for the current question is additionally marked with a dot on the left.
If the “Question repeats” option is also disabled (i.e. repeated questions are prohibited), the menu items for all questions already displayed during the current testing session are unavailable.
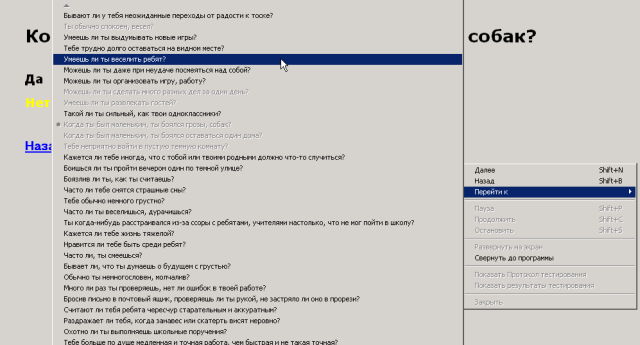
7.6.Final Test Screen
The final test screen performs the following functions:
- If, during testing, the current test contains questions requiring answers that were not answered, the message “You have not answered all required questions! Return to them and answer them” is displayed. A list of links to these questions is shown below the message. In this case, to complete the test successfully you must go to each of these questions (by left-clicking its link) and provide an answer.
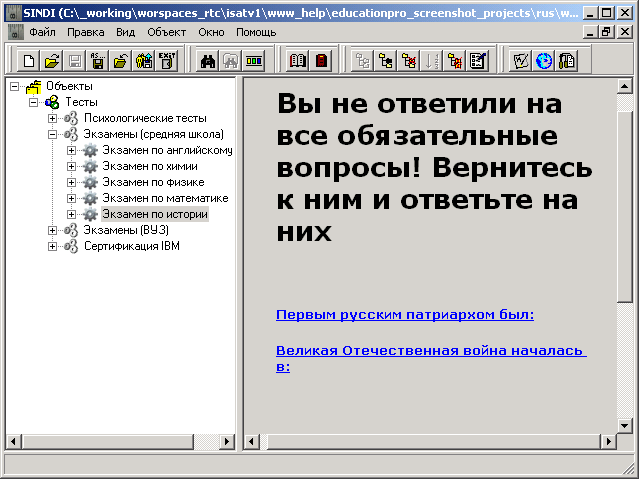
To complete such a test, you must answer all skipped required questions whose links are displayed on the final test screen. To go to a skipped required question from the displayed list, simply left-click one of the links. After navigating to it, select at least one answer.
- If all required answers in the test have been provided, the message “Testing completed! Generate reports and save them if necessary” is displayed. In addition, the context-menu commands for obtaining result reports become available: the “Test Protocol” and the “Test Results Report”.
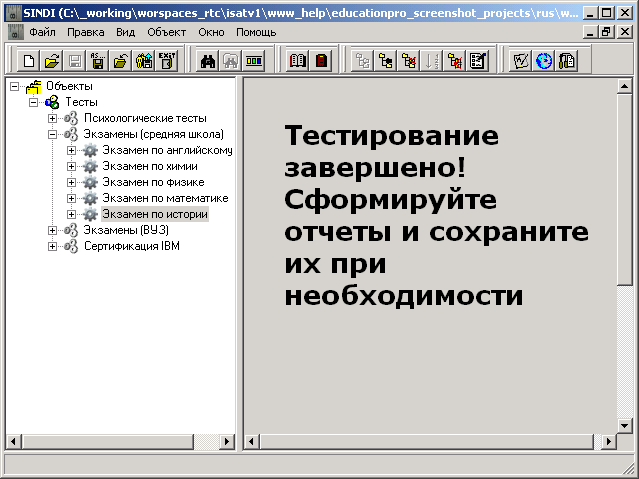
,3
Use these menu commands to save the test results as a text file and use these reports for subsequent analysis.
8.Test Reports
8.1.General Information
The results of any testing session can be evaluated using test reports. Test reports are created as text and can be opened in any text editor.
Test reports can be created on the final test screen after testing is complete. At present, Sindy can create the following types of test reports:
Selecting the appropriately named context-menu command on the final test screen starts the wizard for creating the required report.
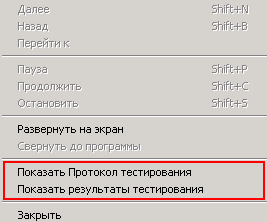
Starting the report-creation wizard opens the “Report Settings” window.
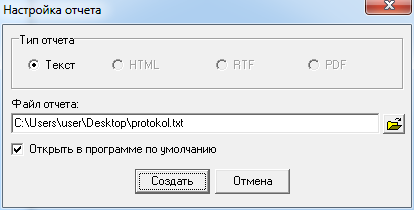
The “Report type” group in the report-settings window shows a list of available report types. In the current version of Sindy, reports can be presented only as plain text.
In the “Report file” field, enter the name of the report file in which the report will be saved, including its full path. For convenient folder selection, use the button 
. This opens an additional “Save As” window that allows the report path and file name to be specified visually.
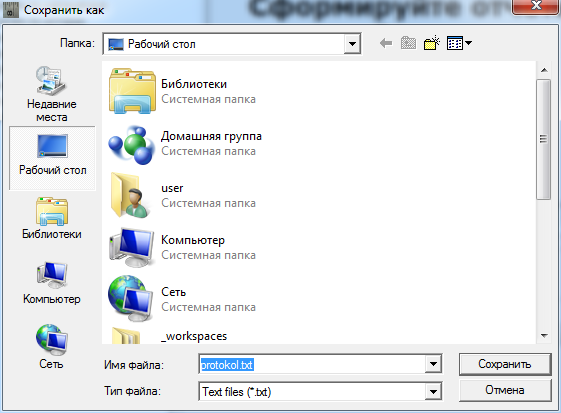
To select the report file, specify its name in the “File name” field. You can enter the full path to the file or use the “Folder” drop-down list and the “Recent Places”, “Desktop”, “Libraries”, “Computer”, or “Network” buttons to locate the file. The “Files of type” drop-down list can be used to enable or disable file filtering by the standard file extension for Sindy reports.
Click “Save” to confirm creation of the report with the specified file name or “Cancel” to cancel the operation and close the current dialog.
It is recommended to give meaningful names to files containing test reports. This makes it easy to navigate them when there are many reports.
If the “Open in default program” option is enabled in the report-settings window, the new report is immediately opened in the program registered on your computer for working with plain-text files. In most cases, this will be the Windows “Notepad” application.
Click “Create” to confirm the report-creation procedure, or “Cancel” if the report does not need to be created.
8.2.Test Protocol
The Test Protocol contains the following data:
- Testing date
- Test name
- List of test questions
- List of answers for each question, indicating (with the word “selected”) the answers selected by the user during testing
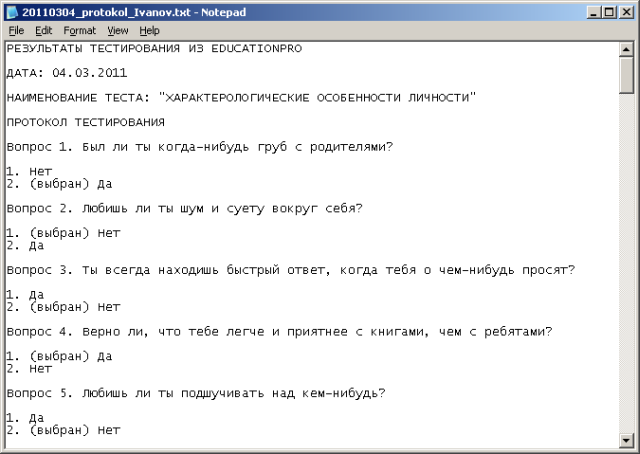
It should be noted that for questions and answers for which descriptions were added when the test was created, the Test Protocol displays those descriptions rather than the names.
This text report can be additionally edited by the user in a text editor and saved in the required form.
8.3.Test Results Report
The Test Results Report contains the following data:
- Testing date
- Test name
- List of test scales with a score for each scale
- A text interpretation corresponding to the result obtained on each scale
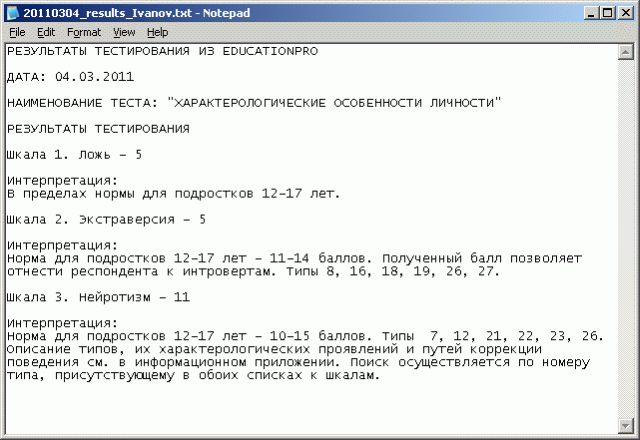
It should be noted that for scales and interpretations for which descriptions were added when the test was created, the Test Results Report displays those descriptions rather than the names.
This text report can be additionally edited by the user in a text editor and saved in the required form.